Using a Cubii Jr1 under-desk elliptical can boost your daily activity, especially if you want to exercise at home or while working. But to get the most from your Cubii Jr1, you need to know how to adjust its resistance settings. Changing resistance helps you control the workout intensity, burn more calories, and match your fitness level. Many people buy a Cubii for easy movement but overlook how much difference the right resistance makes. If you want to avoid common mistakes, keep your Cubii in top shape, and challenge yourself the right way, understanding resistance adjustment is essential. This guide will show you step-by-step how to adjust resistance on the Cubii Jr1, explain what each setting means, and help you choose the right level for your needs.
Understanding The Cubii Jr1 And Its Resistance System
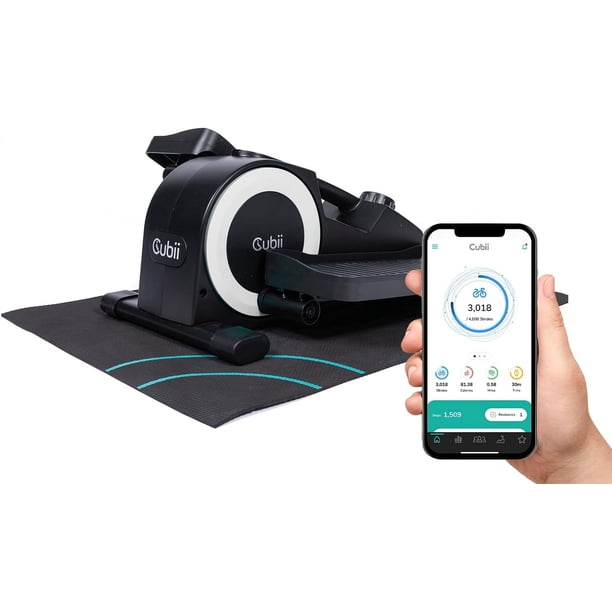
The Cubii Jr1 is a compact elliptical trainer designed for use under a desk or in front of a chair. Unlike larger ellipticals, it focuses on low-impact exercise that fits into your daily routine. The key feature for adjusting workout intensity is its manual resistance dial, which lets you choose from different levels.
What Is Resistance In The Cubii Jr1?
Resistance is the force you feel when you push the pedals. Higher resistance means it’s harder to pedal, giving your muscles a tougher workout. Lower resistance feels smoother and is easier for longer sessions or for beginners. The Cubii Jr1 uses a mechanical resistance system—a dial physically changes how much force is needed to move the pedals.
How Many Resistance Levels Does The Cubii Jr1 Have?
The Cubii Jr1 offers eight resistance levels. Each level adds a bit more challenge, so you can start easy and work your way up as you get stronger. The highest level feels like a brisk walk uphill, while the lowest is like a gentle stroll.
Here’s a simple breakdown:
| Resistance Level | Intensity | Suggested Use |
|---|---|---|
| 1-2 | Very Low | Warm-up, beginners, rehab |
| 3-4 | Low to Moderate | Light cardio, longer sessions |
| 5-6 | Moderate to High | Fitness improvement, calorie burn |
| 7-8 | High | Short, intense workouts |
Knowing these levels helps you pick the right setting for your goals.
Why Adjusting Resistance Matters
Many Cubii owners use the same resistance for every session. But changing resistance can make workouts more effective and interesting. Here’s why it’s important:
- Progress – As your legs get stronger, higher resistance keeps you challenged.
- Calorie Burn – More resistance means your muscles work harder, burning more calories.
- Muscle Tone – Higher resistance activates more muscle fibers.
- Prevent Boredom – Changing resistance keeps workouts fresh and fun.
Non-obvious insight: If you always pedal at the same resistance, your body adapts and results slow down. Mixing it up keeps your body guessing and your progress steady.
Step-by-step: How To Adjust Resistance On Cubii Jr1
Adjusting the Cubii Jr1 resistance is simple, but doing it correctly prevents damage and gets the best workout. Here’s how:
1. Find The Resistance Dial
Locate the resistance dial on your Cubii Jr1. It’s a round knob usually in the center, between the pedals, on top of the main body.
2. Stop Pedaling
Before you change resistance, pause your workout. Adjusting while moving can strain the dial or your knees.
3. Turn The Dial
- To increase resistance: Turn the dial clockwise (to the right).
- To decrease resistance: Turn the dial counterclockwise (to the left).
Each click moves up or down one level. Most people feel a slight “click” with every step.
4. Test The New Resistance
After adjusting, pedal slowly for a few seconds. Notice if it feels harder or easier. If it’s not right, pause and adjust again.
5. Repeat As Needed
You can change resistance during your workout, but always stop pedaling first to avoid injury or equipment wear.
Pro tip: Mark your favorite resistance with a small sticker or tape near the dial, so you can find it quickly next time.
Choosing The Right Resistance Level For Your Goals
Your ideal resistance depends on your fitness level and what you want from your Cubii workouts.
For Beginners Or Rehab
If you’re new to exercise, recovering from injury, or just want to move more, start at level 1 or 2. This helps you learn the motion and avoid overworking your legs. Try short sessions (5–10 minutes) and see how you feel.
For Weight Loss And Cardio
To burn more calories, aim for levels 3 to 6. These levels give your heart a good workout but aren’t too hard to keep going for 15–30 minutes. Try intervals—pedal harder for 2 minutes, then lower the resistance for 3 minutes to recover.
For Strength And Muscle Tone
If your goal is stronger legs, use levels 6 to 8. These higher settings make each push harder, building muscle and stamina. Use shorter sessions (5–10 minutes) and focus on pushing evenly with both legs.
For Office Use
Many people use the Cubii Jr1 while working. For typing or reading, keep resistance low (1–3) so your legs move but don’t distract you. Save higher resistance for breaks or focused exercise.
Comparing Resistance Levels And Effort
How much difference does each level make? Here’s an estimate:
| Resistance Level | Approx. Calories/30 min* | Feels Like |
|---|---|---|
| 1 | 60-70 | Easy walk |
| 4 | 80-100 | Brisk walk |
| 8 | 120-140 | Steep climb |
*Calories depend on your weight and speed.
Non-obvious insight: Even small changes in resistance can double your calorie burn, so don’t underestimate the impact of moving from level 3 to level 5.
Common Mistakes And How To Avoid Them
Adjusting resistance seems simple, but beginners often make mistakes that limit results or risk damage.
Forcing The Dial
Never force the resistance dial past its range. The Cubii Jr1 has 8 levels—stop turning if you reach the end. Forcing can break the dial.
Changing Resistance While Pedaling
It’s tempting to adjust on the go, but this can strip the gears or hurt your knees. Always stop before turning the dial.
Ignoring Regular Maintenance
Dust and sweat can build up around the dial. Wipe it down weekly to keep movement smooth.
Staying At One Level
Many users choose a “comfortable” resistance and never change it. This leads to slow progress and boredom. Try different levels, even in the same session.
Not Listening To Your Body
If resistance feels too hard, lower it. If you feel pain (not just muscle effort), stop and check your setup.
Tips For A Better Cubii Jr1 Resistance Experience
Getting the most from your Cubii Jr1 means more than just adjusting resistance. Here are ways to boost your results:
- Warm Up First: Pedal at the lowest resistance for 2–3 minutes before moving up.
- Use Intervals: Switch between high and low resistance to keep your muscles guessing and burn more fat.
- Track Your Progress: Write down your resistance level and time each session. Challenge yourself to improve slowly.
- Stay Hydrated: Even seated exercise makes you sweat. Drink water before and after.
- Adjust Your Chair: Make sure your seat height allows your legs to move comfortably without strain.
- Mix Resistance: Try using level 2 for 10 minutes, level 5 for 5 minutes, then back to level 2. This prevents fatigue and keeps you engaged.
- Listen to Music: Fast songs can make higher resistance feel easier and more fun.
Maintaining Your Cubii Jr1 For Smooth Resistance Changes
A well-maintained Cubii Jr1 makes resistance adjustment easy and keeps your workouts safe.
Weekly Checks
- Wipe down the machine, especially around the dial and pedals.
- Check for dust or debris under the unit.
- Make sure the dial turns smoothly.
Monthly Tasks
- Check for loose screws or bolts and tighten if needed.
- Test each resistance level to make sure it clicks firmly into place.
- If the dial feels stuck or loose, contact Cubii support before using force.
When To Get Help
If resistance doesn’t change, the dial spins freely, or you hear grinding, stop using the machine. Contact Cubii for repair advice—don’t try to fix internal parts yourself.
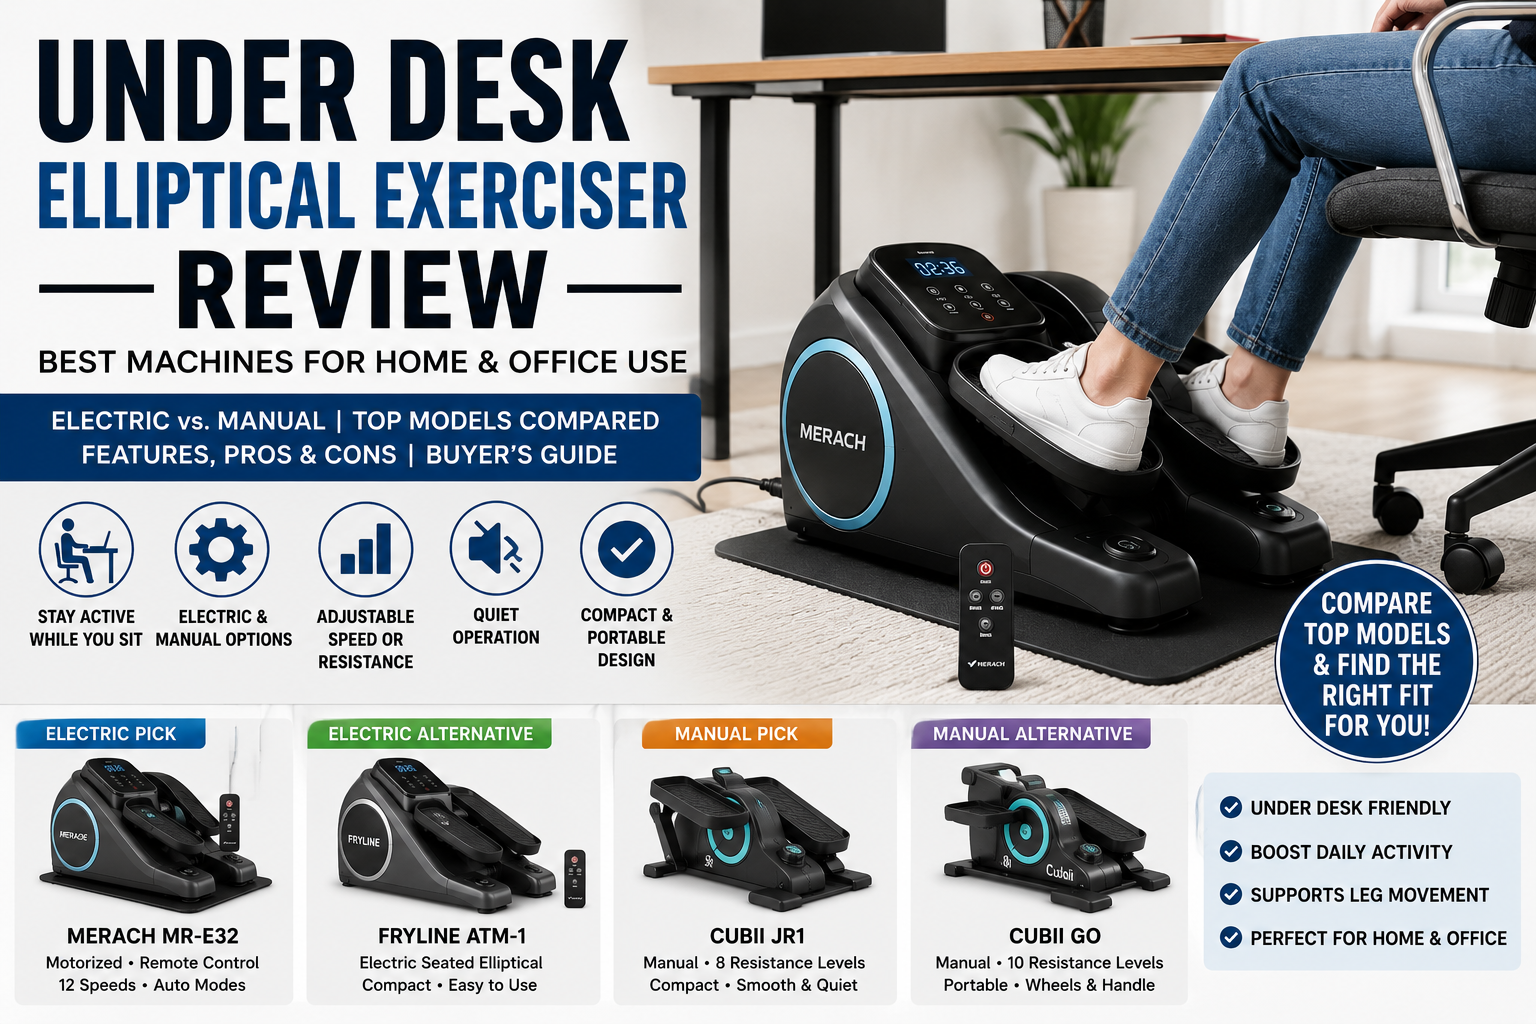
Comparing Cubii Jr1 Resistance To Other Under-desk Ellipticals
Wondering how the Cubii Jr1 stacks up against other models? Here’s a quick comparison of resistance features:
| Model | Resistance Levels | Adjustment Type | Max Intensity |
|---|---|---|---|
| Cubii Jr1 | 8 | Manual dial | High |
| DeskCycle 2 | 8 | Manual dial | Moderate |
| Stamina InMotion | Adjustable | Manual tension knob | Low |
| Sunny Health Mini | 8 | Manual dial | High |
The Cubii Jr1’s resistance dial is easy to use and offers a wide range, making it suitable for most users. Some cheaper models have fewer levels or don’t feel as smooth at high settings.
Using Resistance For Special Situations
For Seniors Or Limited Mobility
Start with the lowest resistance and short sessions. Focus on smooth, controlled motion. Increase resistance only if comfortable.
For Physical Therapy
Always follow your therapist’s advice. The Cubii Jr1 is often used for knee rehab because you can adjust resistance in small steps. Begin at level 1 and only increase under guidance.
For Athletes
Use the highest resistance for short bursts, then drop back to recover. This simulates hill training and builds power.
How To Tell If Your Resistance Is Too High Or Too Low
Choosing the right resistance is key for safety and results.
- Too high: You can’t pedal smoothly, your knees hurt, or you get tired in less than 2 minutes.
- Too low: You can pedal forever and barely feel effort in your legs.
Aim for a level where you feel challenged but can keep good form for your whole session. It’s normal for your legs to feel tired, but sharp pain or discomfort is a sign to stop.
Tracking Your Progress With Resistance
Using different resistance levels lets you measure progress over time. Here’s how:
- Record your settings: Write down the resistance and how long you pedal each session.
- Watch for improvement: If level 4 feels easy after two weeks, try level 5.
- Set small goals: “I will pedal at level 3 for 20 minutes without stopping.”
- Celebrate milestones: When you reach a new level, reward yourself with a healthy treat or extra break.
Some users find that tracking makes them stick with workouts longer.
Real-world Examples: How People Adjust Cubii Jr1 Resistance
Meet Anne, an office worker. She started with level 2 while typing emails, then increased to level 4 during lunch breaks. After a month, she could use level 5 for 15 minutes straight—her knees felt stronger, and she burned more calories every day.
Or take John, who used the Cubii Jr1 for knee rehab. He began with the lowest resistance, moving up only when his therapist said it was safe. After three months, he could walk stairs more easily.
These stories show that adjusting resistance isn’t just about numbers—it’s about making progress at your own pace.
How To Combine Resistance Adjustment With Other Fitness Habits
The Cubii Jr1 can be part of a bigger plan:
- Use it after a walk or before stretching.
- Combine Cubii sessions with light hand weights for a full-body routine.
- Track calories burned and steps to see your total daily movement.
If you want to learn more about how the Cubii Jr1 fits into a healthy lifestyle, visit the official Cubii website at Cubii Blog.
Frequently Asked Questions
How Often Should I Change Resistance On My Cubii Jr1?
It depends on your goals. For variety, try changing resistance every 5–10 minutes during a session. For steady progress, increase the level every 1–2 weeks as you get stronger.
Can I Adjust Resistance While Pedaling?
It’s best to stop pedaling before changing resistance. This keeps the dial working smoothly and prevents injury.
How Do I Know Which Resistance Level Is Right For Me?
Choose a level where you feel effort but can still pedal with good form. If you’re out of breath or feel pain, lower the resistance.
What If The Resistance Dial Feels Stuck?
First, check for dust or debris. If it’s still stuck, don’t force it. Contact Cubii customer support for help.
Does Higher Resistance Mean Better Results?
Not always. Higher resistance builds more muscle, but lower resistance lets you pedal longer for heart health. Mix both for best results.
Making the most of your Cubii Jr1 means understanding and adjusting resistance for your needs. By following these steps and tips, you’ll find workouts more enjoyable and effective. Whether you’re a beginner, returning from injury, or just want to stay active while working, the right resistance can make all the difference.

