Peloton Bike Resistance Levels Explained
The Peloton Bike is more than just a stationary bike—it’s a complete indoor cycling experience. At the heart of this experience is resistance. Whether you’re aiming to lose weight, build muscle, or simply improve your cardiovascular health, understanding resistance levels is crucial. Many new riders focus on cadence or class length, but the real secret to effective Peloton rides lies in how you use resistance.
If you’ve ever wondered why a 30-minute ride can feel easy one day and challenging the next, resistance is likely the reason. It controls how hard you have to work to turn the pedals, directly affecting your calorie burn, muscle engagement, and overall progress.
However, the details of Peloton’s resistance system can be confusing, especially for beginners. This guide will break down everything you need to know—from how resistance works, to advanced tips for maximizing your workouts, and even how Peloton compares to other bikes.
By the end, you’ll feel confident adjusting your resistance and making every ride count.
What Is Peloton Bike Resistance?
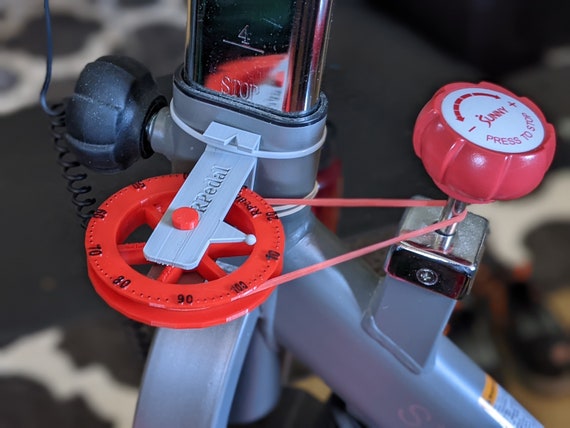
When you ride a Peloton Bike, you’ll notice a red knob in the center. This is the resistance knob. Turning it adjusts how hard it is to pedal. Resistance is measured as a percentage from 0 to 100, shown on the Peloton screen. At 0, you can spin the pedals with almost no effort; at 100, it’s extremely hard, mimicking a steep uphill climb.
Peloton uses a magnetic resistance system. This means there are magnets near the flywheel (the big spinning disk). As you turn the knob, the magnets move closer or farther from the flywheel. Closer magnets create more resistance, making pedaling harder. This system is smooth, quiet, and precise—one reason Peloton bikes feel so premium.
Why Resistance Matters
- Controls Workout Intensity: Higher resistance means your muscles work harder, and your heart rate rises.
- Targets Different Muscles: Low resistance focuses on speed and endurance; high resistance builds strength, especially in your legs and glutes.
- Follows Instructor Cues: Peloton instructors give resistance ranges to match the workout’s goals (e.g., “Set your resistance between 40 and 50”).
- Tracks Progress: Monitoring how much resistance you can handle over time shows your fitness improvements.
Ignoring resistance is one of the biggest mistakes beginners make. Spinning fast at low resistance may burn calories, but it won’t help you get stronger or fitter in the long run.
How Peloton Measures Resistance
Unlike traditional spin bikes with “levels” or “gears,” Peloton displays resistance as a percentage. You’ll see the number change on your screen as you turn the knob.
Here’s what you need to know:
- 0–20: Feels very light; good for warm-ups or recovery.
- 20–50: Moderate; suitable for flat roads, endurance, and most of a typical ride.
- 50–70: Challenging; feels like climbing a hill.
- 70–100: Very difficult; used for short, tough efforts or sprints.
Peloton resistance is very precise. Even small changes (like 1 or 2 points) can make a big difference, especially at higher levels. This allows you to fine-tune your effort.
Resistance And Output
Your output (displayed in watts) is a combination of resistance and cadence (how fast you’re pedaling). More resistance means more work, even if you’re pedaling slower. Here’s a simple example:
- Cadence 80, Resistance 30: Light, easy pace.
- Cadence 80, Resistance 60: Much harder; you’re pushing twice as hard for the same speed.
This is why two riders with the same cadence can have very different outputs.
Peloton Resistance Levels: What Do They Feel Like?
Understanding what each resistance range feels like helps you follow instructor cues—and avoid injury or burnout.
| Resistance Range | How It Feels | Typical Use |
|---|---|---|
| 0–19 | Very easy, almost no effort | Warm-up, recovery |
| 20–39 | Light, comfortable | Endurance, steady-state |
| 40–59 | Moderate, noticeable work | Flat roads, tempo rides |
| 60–79 | Hard, feels like a hill | Climbs, strength intervals |
| 80–100 | Very hard, maximum effort | Sprints, short pushes |
One insight many new riders miss: Resistance is personal. What feels “hard” at 50 for you might be “easy” for someone else. Always listen to your body, and adjust as needed.
How To Adjust Resistance On The Peloton Bike
Using the resistance knob is simple, but getting the most from it takes practice.
- Find the Red Knob: It’s in the center, just below your screen.
- Turn Right (Clockwise) to Increase: More resistance, harder to pedal.
- Turn Left (Counterclockwise) to Decrease: Less resistance, easier to pedal.
- Watch the Screen: The number changes as you turn.
Here are tips for adjusting resistance effectively:
- Make Small Changes: Especially at higher levels, even one or two points can feel much harder.
- Use Instructor Ranges: If the instructor says “50 to 60,” find a spot in that range that matches your fitness.
- Don’t Overdo It: If your form breaks down, lower resistance. Quality is better than suffering through at a high number.
One practical tip: If you often overshoot your target, slow down your adjustment. It’s easy to turn the knob too far, especially during tough intervals.
Resistance And Cadence: Finding The Right Balance
Cadence is how fast you pedal, measured in revolutions per minute (RPM). Peloton instructors give both resistance and cadence ranges to help you hit the workout’s goals.
There’s always a trade-off:
- High Cadence + Low Resistance: Feels easy, helps build endurance.
- Low Cadence + High Resistance: Feels hard, builds strength and power.
For example, a typical Peloton cue might be: “Set your resistance between 40 and 50, cadence 80–90.” This creates a balanced workout—neither too easy nor too hard.
Some beginners focus on spinning as fast as possible, thinking speed is all that matters. In reality, effective training comes from matching the right resistance to the instructor’s cadence target.
Common Mistakes With Peloton Resistance
Many new Peloton riders make the same resistance mistakes. Avoiding these will help you progress faster.
- Ignoring Instructor Ranges: Riding outside the suggested resistance means you’re not following the workout’s design. If you always go too easy or too hard, you’ll miss out on results.
- Using Only Low Resistance: It feels good to spin fast, but low resistance all the time won’t build strength or power.
- Going Too Heavy: Pushing resistance too high can ruin your form and increase the risk of injury. If your knees hurt or your back rounds, lower the resistance.
- Not Adjusting for Fitness: The right number depends on your fitness level. If 40 feels hard, that’s fine—don’t compare yourself to others.
- Making Big Jumps: Small changes are best. Going from 30 to 70 all at once is rarely helpful.
One overlooked detail: If you ride after a tough workout or on tired legs, your usual resistance may feel harder. Adjust accordingly to keep your workout safe and effective.
How Peloton Resistance Levels Compare To Other Bikes
If you’ve used other indoor bikes or spin classes, you may notice their resistance systems are different. Some use “levels” (like 1 to 24), while others have a simple dial with no numbers. Peloton’s 0–100 scale is unique.
Here’s a quick comparison:
| Bike | Resistance Range | System Type |
|---|---|---|
| Peloton Bike | 0–100 | Magnetic (digital display) |
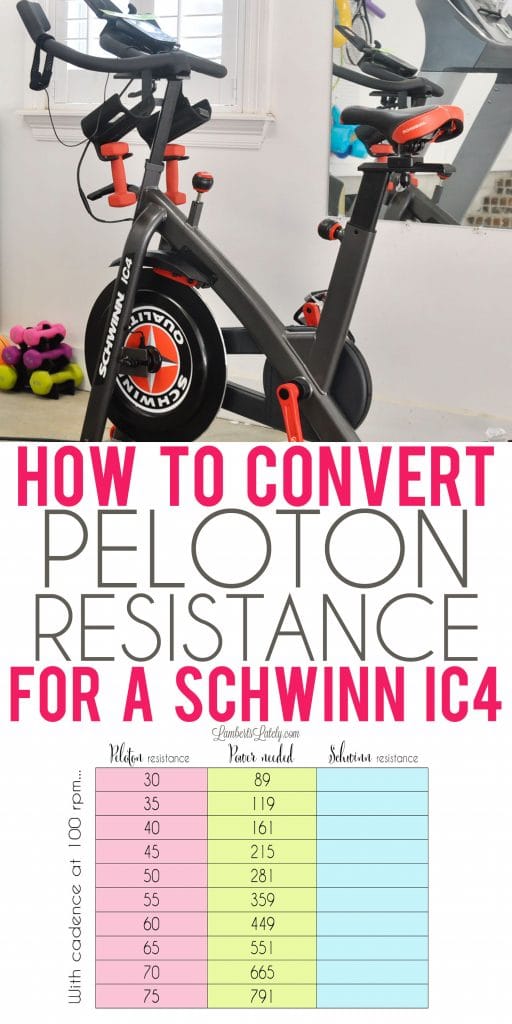
| Schwinn IC4/Bowflex C6 | 1–100 | Magnetic (manual dial, digital display) |
| Keiser M3i | 1–24 | Magnetic (digital display) |
| Traditional Spin Bike | Dial only (no display) | Friction or magnetic (manual) |
A common question: Is Peloton’s “50” the same as Schwinn’s “50”? Usually, they’re close, but not identical. Each brand’s system is calibrated differently. If you switch bikes, expect to spend a few rides figuring out your new settings.
For those using the Peloton App with a non-Peloton bike, there are conversion charts online to help match resistance levels. Still, the feel may not be exactly the same due to differences in flywheel weight and resistance technology.
How Instructors Use Resistance In Peloton Classes
Every Peloton class—from beginner to advanced—uses resistance as a key part of the workout. Here’s how instructors guide you:
- Warm-up: Low resistance (10–30), just to get your legs moving.
- Flat Roads: Moderate resistance (30–50), where you can maintain a steady cadence.
- Hills/Climbs: High resistance (50–70+), slower cadence, simulating an uphill ride.
- Sprints: Brief pushes at high resistance and high cadence, usually in the 50–80 range.
- Intervals: Alternating between easy and hard resistance to build fitness.
Instructors often say, “Find a resistance that feels challenging but sustainable. ” This means you should be working hard, but not so hard that you can’t finish the interval. If you’re new, start at the lower end of the suggested range and build up as you get stronger.
One insight: Many instructors encourage you to “add a little more” resistance over time. This approach, called progressive overload, is essential for continued improvement.
How To Find Your Personal Resistance Zones
If you want to train smarter, it helps to know your own resistance zones. These are ranges tailored to your fitness, similar to heart rate zones in running.
Here’s a simple way to set your zones:
- Easy (Recovery): You can talk easily, feels like 20–35.
- Moderate (Endurance): Breathing faster but in control, feels like 35–50.
- Hard (Threshold/Climb): Can say a few words, feels like 50–70.
- Very Hard (Sprint/Max): Hard to talk, feels like 70–100.
As you get fitter, these numbers may change. Don’t be afraid to adjust your zones every few weeks. Tracking progress in the Peloton app can help you see improvement over time.
Using Resistance For Different Goals
Your fitness goals affect how you should use resistance.
For Weight Loss
- Focus on intervals: Alternate between low and high resistance to boost calorie burn.
- Keep sessions longer (30–60 minutes) at moderate resistance to maximize fat loss.
For Strength
- Spend more time at higher resistance, especially during climbs and out-of-the-saddle efforts.
- Fewer but harder intervals build muscle in your legs and glutes.
For Endurance
- Use lower resistance for longer periods, aiming for steady cadence and heart rate.
- Gradually increase resistance over time to avoid plateauing.
For Hiit (high-intensity Interval Training)
- Short bursts at very high resistance (80–100), followed by full recovery at low resistance.
- These workouts are efficient but challenging—limit to 1–2 times per week to avoid overtraining.
A detail many miss: You can combine goals within a week. For example, do a strength ride one day, a HIIT ride the next, and an endurance ride later in the week. This approach keeps training fun and effective.
Advanced Tips For Mastering Peloton Resistance
Once you’re comfortable with the basics, try these advanced strategies:
- Micro-Adjustments: During a ride, fine-tune your resistance by 1–2 points to stay in the optimal zone. This boosts results without overexertion.
- Standing vs. Seated: Resistance should be higher when you stand. If your pedals spin too easily out of the saddle, add resistance to protect your knees and joints.
- Power Zone Training: Some Peloton classes use “power zones,” based on your Functional Threshold Power (FTP). This involves testing your max effort for 20 minutes, then using that number to set personalized resistance zones for each ride.
- Tracking Progress: Use Peloton’s “output” metric to track how changes in resistance affect your performance. Set small goals (like increasing average resistance by 2–3 points every month).
- Listen to Your Body: Some days, resistance will feel harder due to sleep, nutrition, or stress. Adjust as needed—progress isn’t always linear.
A non-obvious tip: If you train early in the morning or after eating, your resistance “sweet spot” may change. Keep a training log to spot patterns and adjust accordingly.
Calibrating Your Peloton Bike For Accurate Resistance
Calibration ensures the resistance you feel matches the number on the screen. Over time, your bike may lose calibration, making it harder or easier than intended.
Signs Your Bike Needs Calibration
- Resistance feels too easy or too hard compared to before.
- The numbers on your screen don’t match the effort you feel.
- You have trouble hitting instructor targets, even at maximum or minimum resistance.
How To Calibrate
Peloton provides a guided calibration process. It involves turning the resistance knob through its full range while the bike’s sensors recalibrate. For most users, this takes about 10 minutes.
Important: Only recalibrate if you notice major changes. Over-calibrating can cause more harm than good. For step-by-step instructions, see the official Peloton Support page.
Peloton Resistance: Frequently Asked Questions
What Is The Highest Resistance On The Peloton Bike?
The highest resistance is 100. At this setting, the flywheel is almost locked, making it very hard to pedal. Most riders only use this setting for very short sprints or fitness tests. For regular training, staying below 80–90 is usually enough to get a tough workout.
How Do I Know If My Resistance Is Too High Or Too Low?
If your legs are spinning out of control, resistance is too low. If you can’t maintain cadence, are gasping for air, or your form breaks down, resistance is probably too high. It’s better to start lower and gradually increase as you get stronger.
Can I Use Peloton Resistance Levels On Non-peloton Bikes?
You can, but results may vary. Many bikes use different scales or resistance mechanisms. Search for conversion charts online, but be aware they are only approximate. The feel of the ride depends on flywheel weight, resistance technology, and calibration.
How Often Should I Adjust My Resistance During A Ride?
Adjust resistance as often as the instructor cues, or anytime you feel the need to match the workout’s goal. In a typical 30-minute ride, you might adjust resistance 20–30 times—sometimes even more in interval classes.
Why Does My Resistance Feel Different From Day To Day?
Several factors affect how resistance feels: muscle fatigue, hydration, sleep, bike calibration, and even room temperature. If you notice big changes, check your bike’s calibration, and adjust for how you feel each day.
Making The Most Of Peloton Resistance
Mastering resistance is the key to unlocking the full power of your Peloton Bike. Whether you’re a beginner or an experienced rider, understanding how resistance works allows you to tailor every ride to your needs. Remember, the right resistance is the one that challenges you—without sacrificing your form or enjoyment.
With a little practice, you’ll find your sweet spot and see real progress, ride after ride.
Keep experimenting, listen to your body, and don’t be afraid to adjust as you get stronger. Peloton’s resistance system gives you the tools to control your journey—one turn of the knob at a time. If you want to dive deeper into cycling science, check out resources from Britannica for a technical look at resistance and performance.
Happy riding—and may every turn of the knob bring you closer to your goals.

