Replacing the pedals on your Peloton bike may seem like a small detail, but it’s one of the most important maintenance steps for both safety and comfort. Whether your pedals are worn out, you want to switch to a different pedal style, or you simply need to fix a problem, understanding how to replace Peloton bike pedals is essential for every owner. This guide will walk you through everything: why pedal replacement matters, how to choose the right pedals, step-by-step instructions, troubleshooting, maintenance tips, and what to avoid. You’ll learn practical details, discover helpful tips even experienced riders often miss, and find answers to common questions—all in simple, clear language.
Why Peloton Bike Pedal Replacement Matters
Changing the pedals on your Peloton bike is not just about looks or small upgrades. The pedals are a critical connection point between your body and the machine. If they are loose, damaged, or not the right fit, you risk injury and poor performance. Peloton recommends replacing the pedals annually or after 5,000 miles, whichever comes first. This isn’t just a suggestion—old pedals can break suddenly, leading to accidents.
Many riders don’t realize that new pedals can improve power transfer, making each push more efficient. They can also give you access to a wider choice of cycling shoes, which might be more comfortable or fit better. Plus, pedal upgrades let you personalize your ride, like switching to dual-sided or flat pedals for more flexibility.
When Should You Replace Peloton Bike Pedals?
Knowing when to swap your pedals is as important as knowing how. Here are the most common signs:
- Creaking or Clicking Sounds: If you hear noises coming from your pedals, especially under pressure, it’s a warning sign.
- Loose or Wobbly Pedals: Pedals that don’t stay tight or seem unstable need to be replaced.
- Visible Damage: Cracks, chips, or bent parts can lead to pedal failure.
- Clipping Problems: If your shoes don’t clip in smoothly, or pop out unexpectedly, the pedal mechanism may be worn.
- Difficulty Spinning: Pedals should rotate smoothly. If they feel rough or catch, internal bearings may be failing.
- Long Usage: If you’ve ridden more than 5,000 miles or over a year without a change, it’s time.
Ignoring these signs can result in a sudden pedal break while you’re riding, which is a common source of injury for home cyclists.

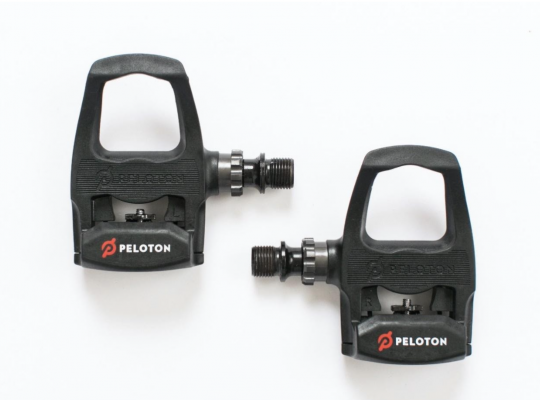
Types Of Pedals Compatible With Peloton Bikes
The original Peloton Bike and Bike+ both come with Look Delta-compatible clip-in pedals. However, you’re not limited to these. Peloton’s crank arms use a standard 9/16-inch thread, which fits most bike pedals. Here are the main types you can use:
- Look Delta Pedals: These are standard on Peloton bikes. They require shoes with Look Delta cleats.
- SPD Pedals: Popular among indoor cyclists and mountain bikers. These require shoes with SPD cleats.
- Dual-Sided Pedals: One side fits Look Delta or SPD cleats, and the other is flat for regular shoes.
- Flat Pedals: For those who want to ride with any shoes, no cleats needed.
Choosing the right pedal depends on your riding style and preferred footwear. If you share your bike with others or want more flexibility, dual-sided pedals are a smart choice.
Choosing The Right Replacement Pedals
Selecting new pedals is about more than just compatibility. Here’s what you should consider:
- Thread Size: Peloton bikes use a 9/16-inch thread. Always check before buying.
- Cleat Compatibility: Make sure your shoes fit the pedal type (Look Delta, SPD, etc. ).
- Material: Aluminum pedals are durable and lightweight. Plastic ones are lighter but wear faster.
- Float: This refers to how much your foot can move side-to-side while clipped in. More float can reduce knee strain.
- Platform Size: Larger platforms offer better support, especially for beginners.
- Maintenance Needs: Some pedals have sealed bearings and need less care.
Below is a quick comparison of common pedal types for Peloton bikes:
| Pedal Type | Cleat System | Best For | Ease of Use | Durability |
|---|---|---|---|---|
| Look Delta | Look Delta | Peloton riders, road cyclists | Medium | High |
| SPD | SPD | Indoor cycling, MTB | Easy | High |
| Dual-Sided | Delta/SPD + Flat | Shared bikes, guests | Very Easy | Medium |
| Flat | None | Casual riders | Very Easy | Medium |
Tools You Need For Pedal Replacement
You won’t need many tools, but using the right ones makes the job safer and faster:
- 15mm pedal wrench: This is the standard tool for most bike pedals. It’s thin and long for leverage.
- Allen (hex) wrench: Some pedals use a 6mm or 8mm hex fitting inside the crank arm.
- Grease: Prevents pedals from seizing and makes future removal easier.
- Clean rag: For wiping threads and cleaning any dirt or debris.
A small but important tip: Never use a regular adjustable wrench or pliers. These can slip and strip the pedal flats.
Preparing For Pedal Replacement
Before you start, make sure the bike is stable. Place it on a flat surface. If you have a mat under your Peloton, that’s perfect. You may want to lean the bike slightly to the opposite side you’re working on to avoid tipping.
- Wear gloves to avoid grease stains or injuries.
- Have all your tools within easy reach.
- If you’re new to bike maintenance, take a photo of your current pedal setup for reference.
Step-by-step Guide To Replacing Peloton Bike Pedals
Changing pedals is simple if you follow each step carefully. Here’s a clear, experience-based process:
1. Remove The Old Pedals
- Identify left and right pedals. The right pedal (drive side) uses a standard thread. The left pedal has a reverse (left-hand) thread.
- Position the crank arms so the pedal you’re removing is at 3 o’clock (right) or 9 o’clock (left).
- For the right pedal: Place the pedal wrench or hex key on the pedal axle, then turn it counterclockwise (left) to loosen.
- For the left pedal: Turn the wrench clockwise (right) to loosen. This is the opposite of most screws!
- Once loose, use your hand to unscrew the pedal the rest of the way.
2. Clean And Prepare The Threads
- Wipe the pedal threads and crank arm holes with a clean rag.
- Apply a small amount of bike grease to the threads of your new pedals. This prevents sticking and makes future removal easier.
3. Install The New Pedals
- Start by screwing each pedal by hand to avoid cross-threading.
- For the right pedal: Turn clockwise (right) to tighten.
- For the left pedal: Turn counterclockwise (left) to tighten.
- Once hand-tight, use the pedal wrench or hex key to secure the pedal firmly. Don’t over-tighten—snug is enough.
4. Double-check Everything
- Spin each pedal by hand. It should move smoothly with no grinding or wobble.
- Check that each pedal is fully tightened.
- Wipe away any extra grease.
5. Test Your Setup
- Clip in your cycling shoes and test the engagement and release.
- If using dual-sided pedals, try both sides to ensure they work as expected.
Here’s a quick summary of the steps for visual reference:
| Step | Action | Key Detail |
|---|---|---|
| 1 | Remove right pedal | Counterclockwise to loosen |
| 2 | Remove left pedal | Clockwise to loosen (reverse thread) |
| 3 | Clean and grease threads | Prevents seizing |
| 4 | Install right pedal | Clockwise to tighten |
| 5 | Install left pedal | Counterclockwise to tighten |
| 6 | Test pedals | Smooth rotation, secure fit |
Common Mistakes To Avoid
Even experienced cyclists make errors when changing pedals. Here are mistakes you can easily avoid:
- Mixing up pedal threads: The left pedal is reverse-threaded. Trying to loosen or tighten it the wrong way can damage your crank arm.
- Cross-threading: Forcing a pedal at an angle can ruin the threads. Always start by hand.
- Skipping grease: Without it, pedals can “freeze” into the crank arm over time.
- Over-tightening: Too much force may strip the threads or break the crank arm.
- Using the wrong tools: A pedal wrench is designed for this job. Don’t substitute.
A non-obvious tip: If you have trouble removing stuck pedals, try adding a little penetrating oil and let it sit for 10 minutes. Use controlled force rather than sudden jerks.
Upgrading To Different Pedal Systems
Some riders want to change pedal systems completely, such as moving from Look Delta to SPD, or to dual-sided pedals for more options. Here’s how to make a smooth upgrade:
- Check crank arm compatibility: Peloton uses a 9/16-inch thread, so most standard pedals fit.
- Buy new cleats if switching systems: SPD and Look Delta cleats are not interchangeable.
- Adjust your seat height: New pedal types can slightly change your foot position, so you may need to tweak your bike fit.
- Test the new system before a hard workout: Get used to clipping in and out in a safe environment.
Switching systems can open up more shoe choices, but always check the pedal and cleat compatibility before buying.
Maintenance Tips For Your New Pedals
Once you’ve replaced your pedals, a few simple habits will make them last longer and keep your rides smooth:
- Check tightness monthly: Pedals can work themselves loose over time.
- Clean after sweaty rides: Wipe down pedals to remove sweat and grime, which can corrode metal.
- Inspect for damage: Look for cracks or worn mechanisms regularly.
- Regrease yearly: Remove, clean, and re-grease the threads at least once a year.
- Replace cleats as needed: Worn cleats can lead to accidental unclipping.
A quick maintenance schedule can help:
| Task | Frequency |
|---|---|
| Check pedal tightness | Monthly |
| Wipe pedals clean | After each ride |
| Inspect for wear | Quarterly |
| Remove and regrease | Yearly |
| Replace cleats | When worn |
How To Identify Quality Pedals
Not all pedals are created equal. Here’s how you can spot high-quality options:
- Metal construction: Aluminum or steel lasts longer than plastic.
- Sealed bearings: These keep out sweat and dust, making pedals spin smoothly.
- Adjustable tension: Lets you fine-tune how tight the cleat clips in.
- Brand reputation: Trusted brands like Shimano, Look, and Wellgo offer consistent quality.
A non-obvious insight: Cheap pedals may look similar but often use low-grade materials or poor bearings, leading to early failure and possible injury.
Pedal Replacement And Peloton Warranty
Many owners worry that replacing pedals will void their Peloton warranty. Here’s what you need to know:
- Peloton’s policy: Replacing pedals with compatible ones does not void your warranty. However, damage caused by incorrect installation or use of non-standard pedals is not covered.
- Keep original pedals: If you need to make a warranty claim, you may have to reinstall the original pedals.
- Be careful with crank arm threads: Stripping these threads is not covered by warranty.
If you’re unsure, you can always contact Peloton support for advice before making changes.
Safety Tips After Pedal Replacement
After you’ve installed new pedals, take these extra steps for safety:
- Test clip-in and release: Practice clipping in and out several times before riding at full effort.
- Wear proper shoes: Make sure your cleats are in good condition and fitted tightly to your shoes.
- Listen for noise: Any creaks or clicks during your ride may mean the pedals aren’t tightened enough.
Never ignore unusual feelings or sounds. Stop and check your pedals immediately to avoid injury.
Environmental Impact: Recycle Old Pedals
Don’t just throw old pedals in the trash. Many local bike shops or recycling centers accept metal bike parts. Recycling helps reduce waste and keeps harmful materials out of landfills.
If your old pedals are still safe and usable, consider donating them to a local cycling group or charity. Someone else may benefit from them.
Troubleshooting: What If Pedals Won’t Come Off?
Sometimes, pedals seem stuck no matter what you do. Here’s how to handle stubborn cases:
- Use a longer wrench: More leverage makes removal easier.
- Add penetrating oil: Let it soak into the threads for 10-15 minutes.
- Tap gently: Use a rubber mallet to tap the end of the wrench (not the pedal itself) for extra force.
- Check thread direction: Remember, left pedal is reverse-threaded.
If all else fails, visit a local bike shop. Forcing a stuck pedal can damage the crank arm.
Real-world Example: Upgrading Pedals For A Family Bike
Many Peloton bikes are shared among family members. One common scenario: one person uses cycling shoes, others prefer sneakers. In this case, switching to dual-sided pedals makes sense. On one side, you keep the clip-in for the serious rider; on the other, a flat surface for casual users. This small upgrade can transform the bike into a truly family-friendly machine.
Another user wanted quieter rides and found that swapping to a pedal with sealed bearings not only reduced noise but also made pedal strokes smoother, improving the overall experience.
Where To Buy Replacement Pedals
You can find replacement pedals at:
- Local bike shops: Staff can help ensure compatibility.
- Online retailers: Websites like Amazon, REI, and Peloton’s own store offer a wide selection.
- Cycling specialty stores: For high-end or specific pedal systems.
Always check reviews and product details before buying. Avoid very cheap, unbranded pedals—they may not be safe or durable.
For more detailed information on pedal compatibility and bike maintenance, you can visit the Bicycle Pedal Wikipedia page.
Frequently Asked Questions
How Often Should I Replace My Peloton Bike Pedals?
You should replace your pedals every year or after about 5,000 miles of riding, whichever comes first. If you notice any signs of wear, such as noise, looseness, or difficulty clipping in, replace them sooner to avoid accidents.
Can I Use Spd Pedals On My Peloton Bike?
Yes, as long as the pedals have a 9/16-inch thread, SPD pedals will fit your Peloton. You’ll also need SPD-compatible shoes and cleats. This is a popular upgrade for riders who prefer SPD’s smaller cleats or already own compatible shoes.
What Tools Do I Need To Change Peloton Pedals?
A 15mm pedal wrench or a 6mm/8mm Allen (hex) key is all you need. Also, use bike grease for the new pedal threads. Never use a regular wrench, as it may not fit properly and could damage the pedals.
Will Changing My Pedals Void My Peloton Warranty?
No, changing pedals with compatible parts does not void your warranty. However, if you damage the crank arm threads during installation or use incompatible pedals, you may lose warranty coverage for those parts.
What Should I Do If My New Pedals Feel Loose?
Immediately stop riding and recheck the installation. Make sure the pedal is threaded correctly and fully tightened. If it still feels loose, check for stripped threads in the crank arm. If you’re unsure, ask a bike shop for help.
Replacing the pedals on your Peloton bike is a small job that makes a big difference. With the right tools, a little care, and smart choices, you’ll enjoy a safer, smoother, and more comfortable ride—mile after mile.

