Can You Do Assisted Dips On A Dip Station?
Many people who want to build stronger arms, chest, and shoulders quickly discover the value of dips. Dips are a classic bodyweight exercise, but not everyone can do them with perfect form right away. This is where assisted dips come in. But what if your gym only has a standard dip station? Can you do assisted dips on a dip station, or do you need a special machine? The answer is yes, you absolutely can—and it’s easier and more flexible than you might think. This article will guide you step by step through everything you need to know to safely and effectively do assisted dips on a dip station, even if you’re a complete beginner.
What Are Assisted Dips?
Assisted dips are simply dips where you use some kind of support to make the movement easier. This support reduces the amount of bodyweight you have to lift, so you can focus on proper form and gradually build strength. Assisted dips help you progress toward doing unassisted dips, which require lifting your entire body weight using your arms and upper body.
Beginners or those recovering from injury often struggle to do regular dips. That’s normal—dips are a tough, compound exercise. Assisted dips allow you to practice the movement, strengthen your muscles, and avoid bad habits or injuries.
How Dip Stations Work
A dip station is a piece of gym equipment made of two parallel bars, usually about shoulder-width apart. You grip these bars, support your body with straight arms, and lower yourself down before pushing back up. Dip stations are simple, sturdy, and found in almost every gym.
What makes a dip station versatile is its simplicity. You can use it for triceps dips, chest dips, knee raises, and more. But, on its own, it doesn’t have built-in assistance. That’s where creativity and a few basic tools come in.
Methods To Do Assisted Dips On A Dip Station
You do not need a special machine to perform assisted dips. Here are the most common and effective ways to do assisted dips on a standard dip station:
1. Resistance Bands
This is the most popular and practical method. Resistance bands are stretchy, strong bands that can help support part of your weight.
How to use them for assisted dips:
- Loop a strong resistance band over both dip bars.
- Place your knees or feet into the band’s loop.
- The band stretches as you lower yourself, helping you push back up.
The thicker the band, the more assistance it provides. As you get stronger, you can use thinner bands for less help.
2. Partner Assistance
If you have a training partner, they can help you do assisted dips safely.
Steps:
- Position yourself on the dip station.
- Your partner stands behind you.
- As you lower into the dip, your partner supports your legs or hips, lifting just enough to help you complete the rep.
This method allows for real-time adjustments and encouragement, but it does require trust and communication.
3. Using A Box Or Bench
A sturdy box or bench under your feet can reduce the load on your arms.
How it works:
- Place a box or bench under the dip bars.
- Stand on the box, grip the bars, and support part of your weight with your legs as you dip.
- Use your legs only as much as necessary to push back up.
This method is great for absolute beginners who need maximum support and for those training at home.
4. Eccentric (negative) Dips
Even if you can’t push yourself up, you may be able to lower yourself down slowly. This is called an eccentric dip.
How to perform:
- Use a step or jump to start at the top position.
- Lower yourself as slowly as possible.
- At the bottom, use your legs or a box to get back to the top.
Eccentric dips build strength in the same muscles and help you progress to full dips.
5. Feet-assisted Dips
If the dip bars are low enough, you can keep your feet on the ground for partial support.
What to do:
- Place your feet on the floor or on a raised surface in front of you.
- Use your legs for assistance as needed, making the exercise easier or harder based on how much you push with your legs.
This method is simple but effective and works well for people with limited upper body strength.
Comparing Assisted Dip Methods
To help you decide which method fits your needs, here’s a comparison of the main assisted dip techniques:
| Method | Equipment Needed | Difficulty Level | Best For |
|---|---|---|---|
| Resistance Bands | Band(s) | Customizable | Most users, all levels |
| Partner Assistance | Training partner | Customizable | Beginners, social workouts |
| Box/Bench Support | Box or bench | Very easy | Absolute beginners |
| Eccentric Dips | Step or box (optional) | Medium | Building strength, technique |
| Feet-Assisted | Low dip station | Easy to medium | All levels, rehab |
Why Do Assisted Dips?
Doing assisted dips on a dip station offers several key benefits:
- Builds strength progressively: You can start with a lot of support and gradually reduce it.
- Prevents injuries: Good form is easier to maintain with less bodyweight, lowering the risk of shoulder or elbow pain.
- Increases confidence: Seeing improvement with assistance motivates you to keep going.
- Improves technique: You can focus on the right movement pattern, not just surviving the rep.
Step-by-step: Assisted Dips With Resistance Bands
Let’s break down the most common method. Here’s how to do assisted dips with a resistance band on a dip station:
- Choose the right band. For most beginners, a thick band (heavy resistance) works best.
- Attach the band. Loop the resistance band around both dip bars so it hangs down the middle.
- Position yourself. Stand on a box or step if needed. Hold onto the dip bars and place your knees or feet into the band’s loop.
- Set your grip and posture. Keep your shoulders down, chest up, and elbows close to your body.
- Lower yourself. Bend your elbows to lower your body slowly. Go as low as is comfortable without pain.
- Push back up. Press through your palms, letting the band help you return to the top.
- Repeat. Start with 3 sets of 6–8 reps, resting 1–2 minutes between sets.
Pro tip: If the band feels too easy or too hard, adjust to a different thickness.
Common Mistakes To Avoid
Even with assistance, mistakes can ruin your progress or cause injury. Here are errors to watch out for:
- Letting shoulders shrug up: Always keep shoulders away from your ears.
- Elbows flaring out: Keep elbows close, not wide, to protect your joints.
- Not going low enough: Try to lower until your upper arms are parallel with the ground, unless you have shoulder pain.
- Bouncing at the bottom: Move slowly and with control.
- Relying too much on legs (with box/bench method): Use your legs only as much as needed.
Progression: Moving From Assisted To Unassisted Dips
The ultimate goal is to do unassisted dips. Here’s how to progress:
- Start with a thick band or a lot of support.
- When you can do 10–12 assisted dips with good form, switch to a thinner band or less assistance.
- Gradually reduce the help until you can do a dip with just your bodyweight.
- Mix in eccentric dips (slow lowering) to build strength in the hardest part of the movement.
- Test yourself with full dips every couple of weeks.
Tip: Progress is not always linear. Some days will feel harder than others. Consistency is what matters most.
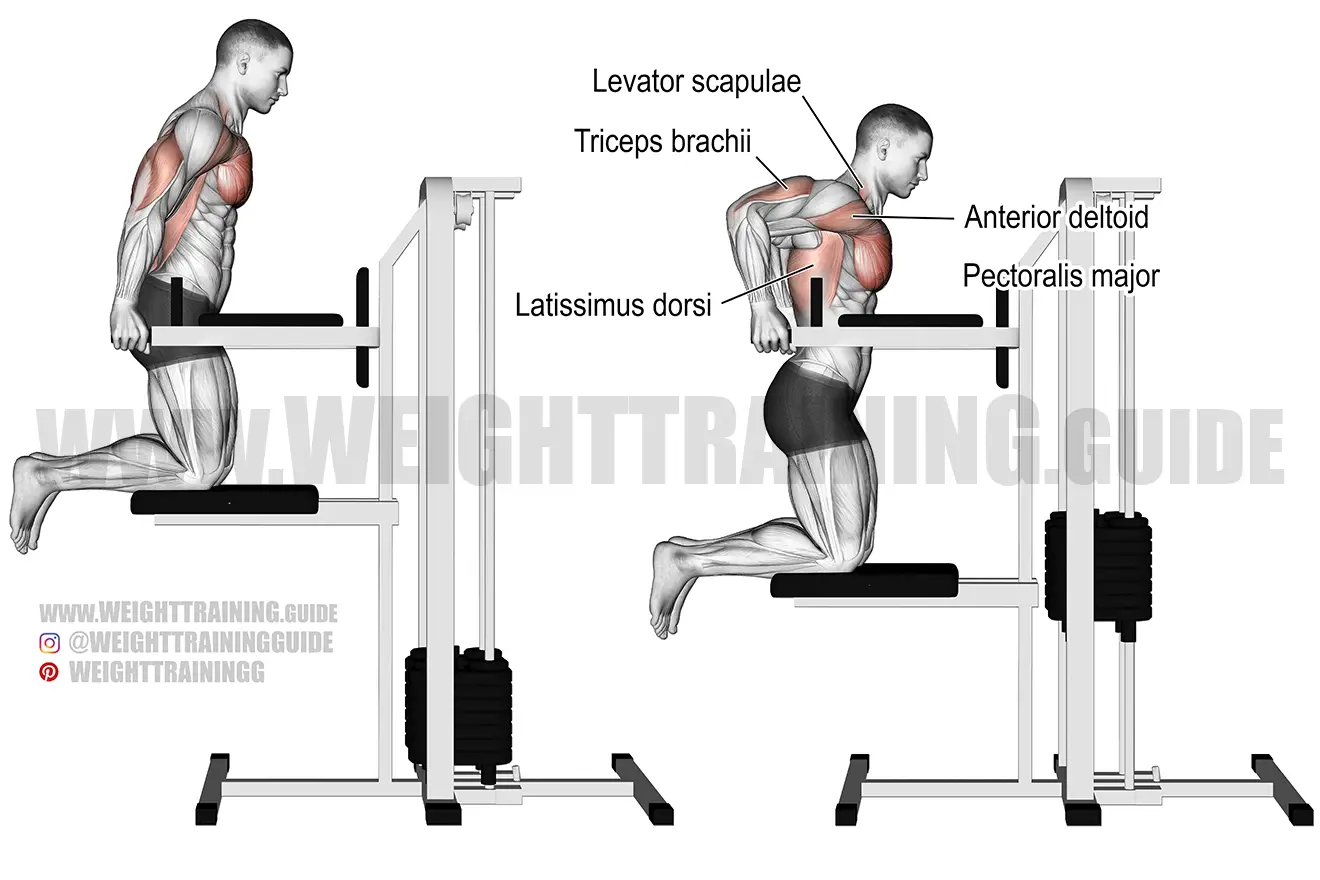
Benefits Of Doing Dips (assisted Or Not)
Dips offer several unique benefits over other upper body exercises:
- Works multiple muscles: Triceps, chest, shoulders, and even core.
- Improves pushing strength: Helps with push-ups, bench press, and daily activities.
- Boosts muscle size: Dips are great for building bigger triceps and chest.
- Requires little equipment: Just a dip station and maybe a band.
A 2012 study in the *Journal of Strength and Conditioning Research* found that dips activate the triceps more effectively than push-ups and many other bodyweight exercises. This makes them a smart choice for arm development.
Who Should Use Assisted Dips?
Assisted dips are not just for beginners. They’re useful for:
- Beginners: Learning the movement and building a strength base.
- Overweight individuals: Reducing the load makes dips possible.
- People with injuries: Allows safe movement without overloading joints.
- Advanced athletes: Warming up, doing high reps, or focusing on perfect form.
If you’re coming back from a shoulder injury or surgery, always check with a physical therapist before adding dips.
Resistance Band Selection Guide
Choosing the right resistance band is important for safety and effectiveness. Here’s a quick overview:
| Band Thickness | Assistance (Approx.) | Best For |
|---|---|---|
| Thick (2+ inches) | 60–100 lbs | New beginners, heavy support |
| Medium (1–2 inches) | 35–60 lbs | Intermediate, moderate support |
| Thin (0.5–1 inch) | 15–35 lbs | Advanced, light support |
As you get stronger, you can buy a set of bands and switch between them to fine-tune your progress.
Safety Tips For Assisted Dips
Safety is always a priority with any exercise, especially dips. Here’s how to keep your joints healthy:
- Warm up before starting. Arm circles, push-ups, or light band pulls help.
- Check equipment. Make sure the dip station is stable, the band is not worn out, and the box or bench is sturdy.
- Avoid pain. If you feel sharp pain in your shoulders, stop immediately.
- Don’t rush. Control the movement both down and up.
- Breathe. Inhale as you lower, exhale as you press up.
Non-obvious insight: Many people overlook the importance of grip strength in dips. If your hands slip or feel weak, use chalk or gloves, or improve grip with farmer’s walks.
When To Add Weight Or Reduce Assistance
If you’re doing 12–15 assisted dips with perfect form and no strain, it’s time to progress. Here’s how:
- Use a thinner band.
- Move to unassisted bodyweight dips.
- To increase challenge, add a dip belt and hang weight plates or a dumbbell.
Remember, more weight is not always better. Good form is always more important than extra reps or weight.
Real-life Example: Assisted Dips For Beginners
Let’s look at a typical beginner’s journey:
- Week 1: Can’t do a single dip. Starts with a thick band, manages 3 reps per set.
- Week 4: Using the same band, now doing 8 reps per set, 3 sets.
- Week 8: Switches to a thinner band, does 5 reps per set.
- Week 12: Tries unassisted dips. Can do 1–2 with good form.
In 3 months, with consistent training, most beginners can go from zero dips to at least one unassisted dip.

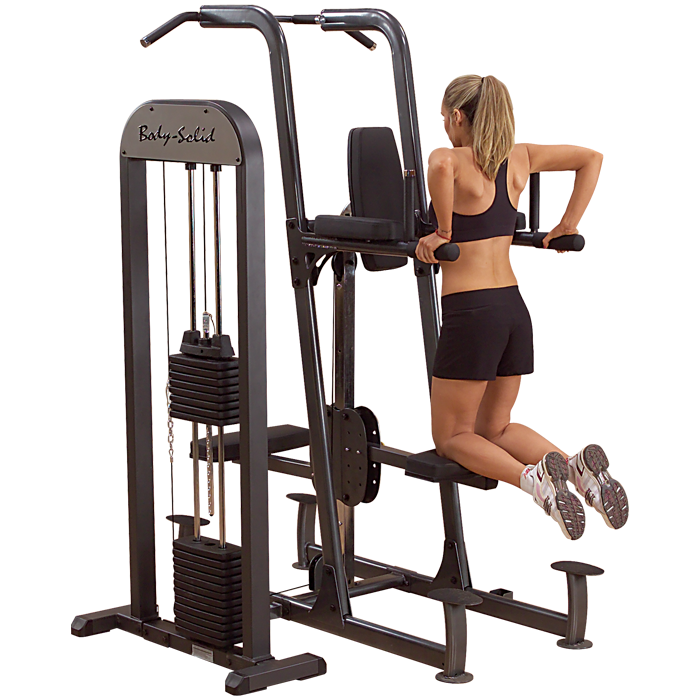
How Assisted Dips Compare To Machine-assisted Dips
Many gyms have a special assisted dip machine with a weight stack. Both machine-assisted and band-assisted dips have pros and cons.
| Feature | Band-Assisted Dips | Machine-Assisted Dips |
|---|---|---|
| Equipment Needed | Dip station + band | Special machine |
| Availability | Almost all gyms | Only large gyms |
| Natural movement | Yes | Less natural |
| Progression | Change bands | Add/remove weight |
| Stability required | High | Low |
Band-assisted dips usually feel more “real” and build stabilizer muscles, while machine dips are great for absolute beginners or those with balance issues.
Alternatives To Assisted Dips
If you can’t access a dip station, you can still train similar muscles with these exercises:
- Bench dips: Using a bench or chair, feet on the floor.
- Push-ups: Hands close for more triceps focus.
- Triceps extensions: With dumbbells or bands.
- Chest press: Machine or dumbbells.
But, nothing exactly matches the muscle activation and joint angle of real dips.
Practical Tips For Faster Progress
- Train dips 2–3 times per week for best results.
- Log your workouts so you can track band thickness, reps, and sets.
- Film your dips (if allowed) to check form and fix mistakes.
- Stretch shoulders and chest after training to avoid tightness.
- Use a mirror to watch your form, or ask a coach for feedback.
Non-obvious tip: Sometimes progress stalls because of weak core or grip, not just arms. Add planks and farmer’s carries to your routine for balance.
Common Questions And Misconceptions
Some people believe you can’t do assisted dips on a regular dip station. In truth, with bands or simple support, you can. Another myth is that dips are “bad for shoulders. ” Dips are safe if you use proper form and avoid dropping too low.
If you have long arms or a bigger body, dips may feel harder. That’s normal. Use more assistance or start with a higher band until you get stronger.
Supported By Science
Research supports the use of assisted dips for strength building. According to a study published in the *Scandinavian Journal of Medicine & Science in Sports*, using bands for assistance allows for similar muscle activation as machine assistance but with more activation in stabilizing muscles.
This means you get more functional strength gains.
For more detailed scientific information on resistance training, you can visit the Wikipedia page on resistance training.
Frequently Asked Questions
Can I Do Assisted Dips If I Have Shoulder Pain?
If you have current or past shoulder pain, start with very light assistance, keep your range of motion shallow, and focus on perfect form. If pain continues, stop and consult a physical therapist. Assisted dips can be safe, but only if you listen to your body.
How Many Reps Should I Do When Starting Assisted Dips?
For most beginners, 6–8 reps per set for 2–3 sets is a good starting point. As you get stronger, increase reps or reduce assistance. The goal is to maintain good form throughout.
What’s The Best Way To Progress To Unassisted Dips?
Gradually use less assistance (thinner bands, less leg help). Add eccentric dips and test full dips every few weeks. Consistency and patience are key—don’t rush.
Can I Use Resistance Bands For Other Exercises On The Dip Station?
Yes! Resistance bands are versatile. You can use them for pull-ups, push-ups, chest flyes, and more on the dip station. This makes them a smart investment for any home or gym setup.
Is There A Limit To How Much Assistance I Should Use?
Use as much assistance as needed to perform dips with perfect form, but try to reduce help over time. If you’re relying on the band or support for more than 12–15 reps without fatigue, it’s time to make the exercise harder.
Doing assisted dips on a dip station is not only possible—it’s one of the most effective ways to learn real dips and build upper body strength. With the right tools and knowledge, anyone can work up to this challenging, rewarding exercise. Stay consistent, adjust your assistance as you get stronger, and always prioritize form and safety. In time, you’ll be doing dips with confidence and power.
