Are Wall-mounted Dip Stations Better?
If you want to build strong arms, chest, and core at home, you may be considering a dip station. But with so many types—portable, free-standing, and wall-mounted—how do you know if a wall-mounted dip station is the best choice? For many fitness fans, wall-mounted models are seen as the gold standard, but why? Is this reputation deserved? Here, we’ll explore how wall-mounted dip stations compare with other types. You’ll discover their true strengths, possible drawbacks, and what to consider before buying. By the end, you’ll know if a wall-mounted dip station fits your needs, space, and training style.
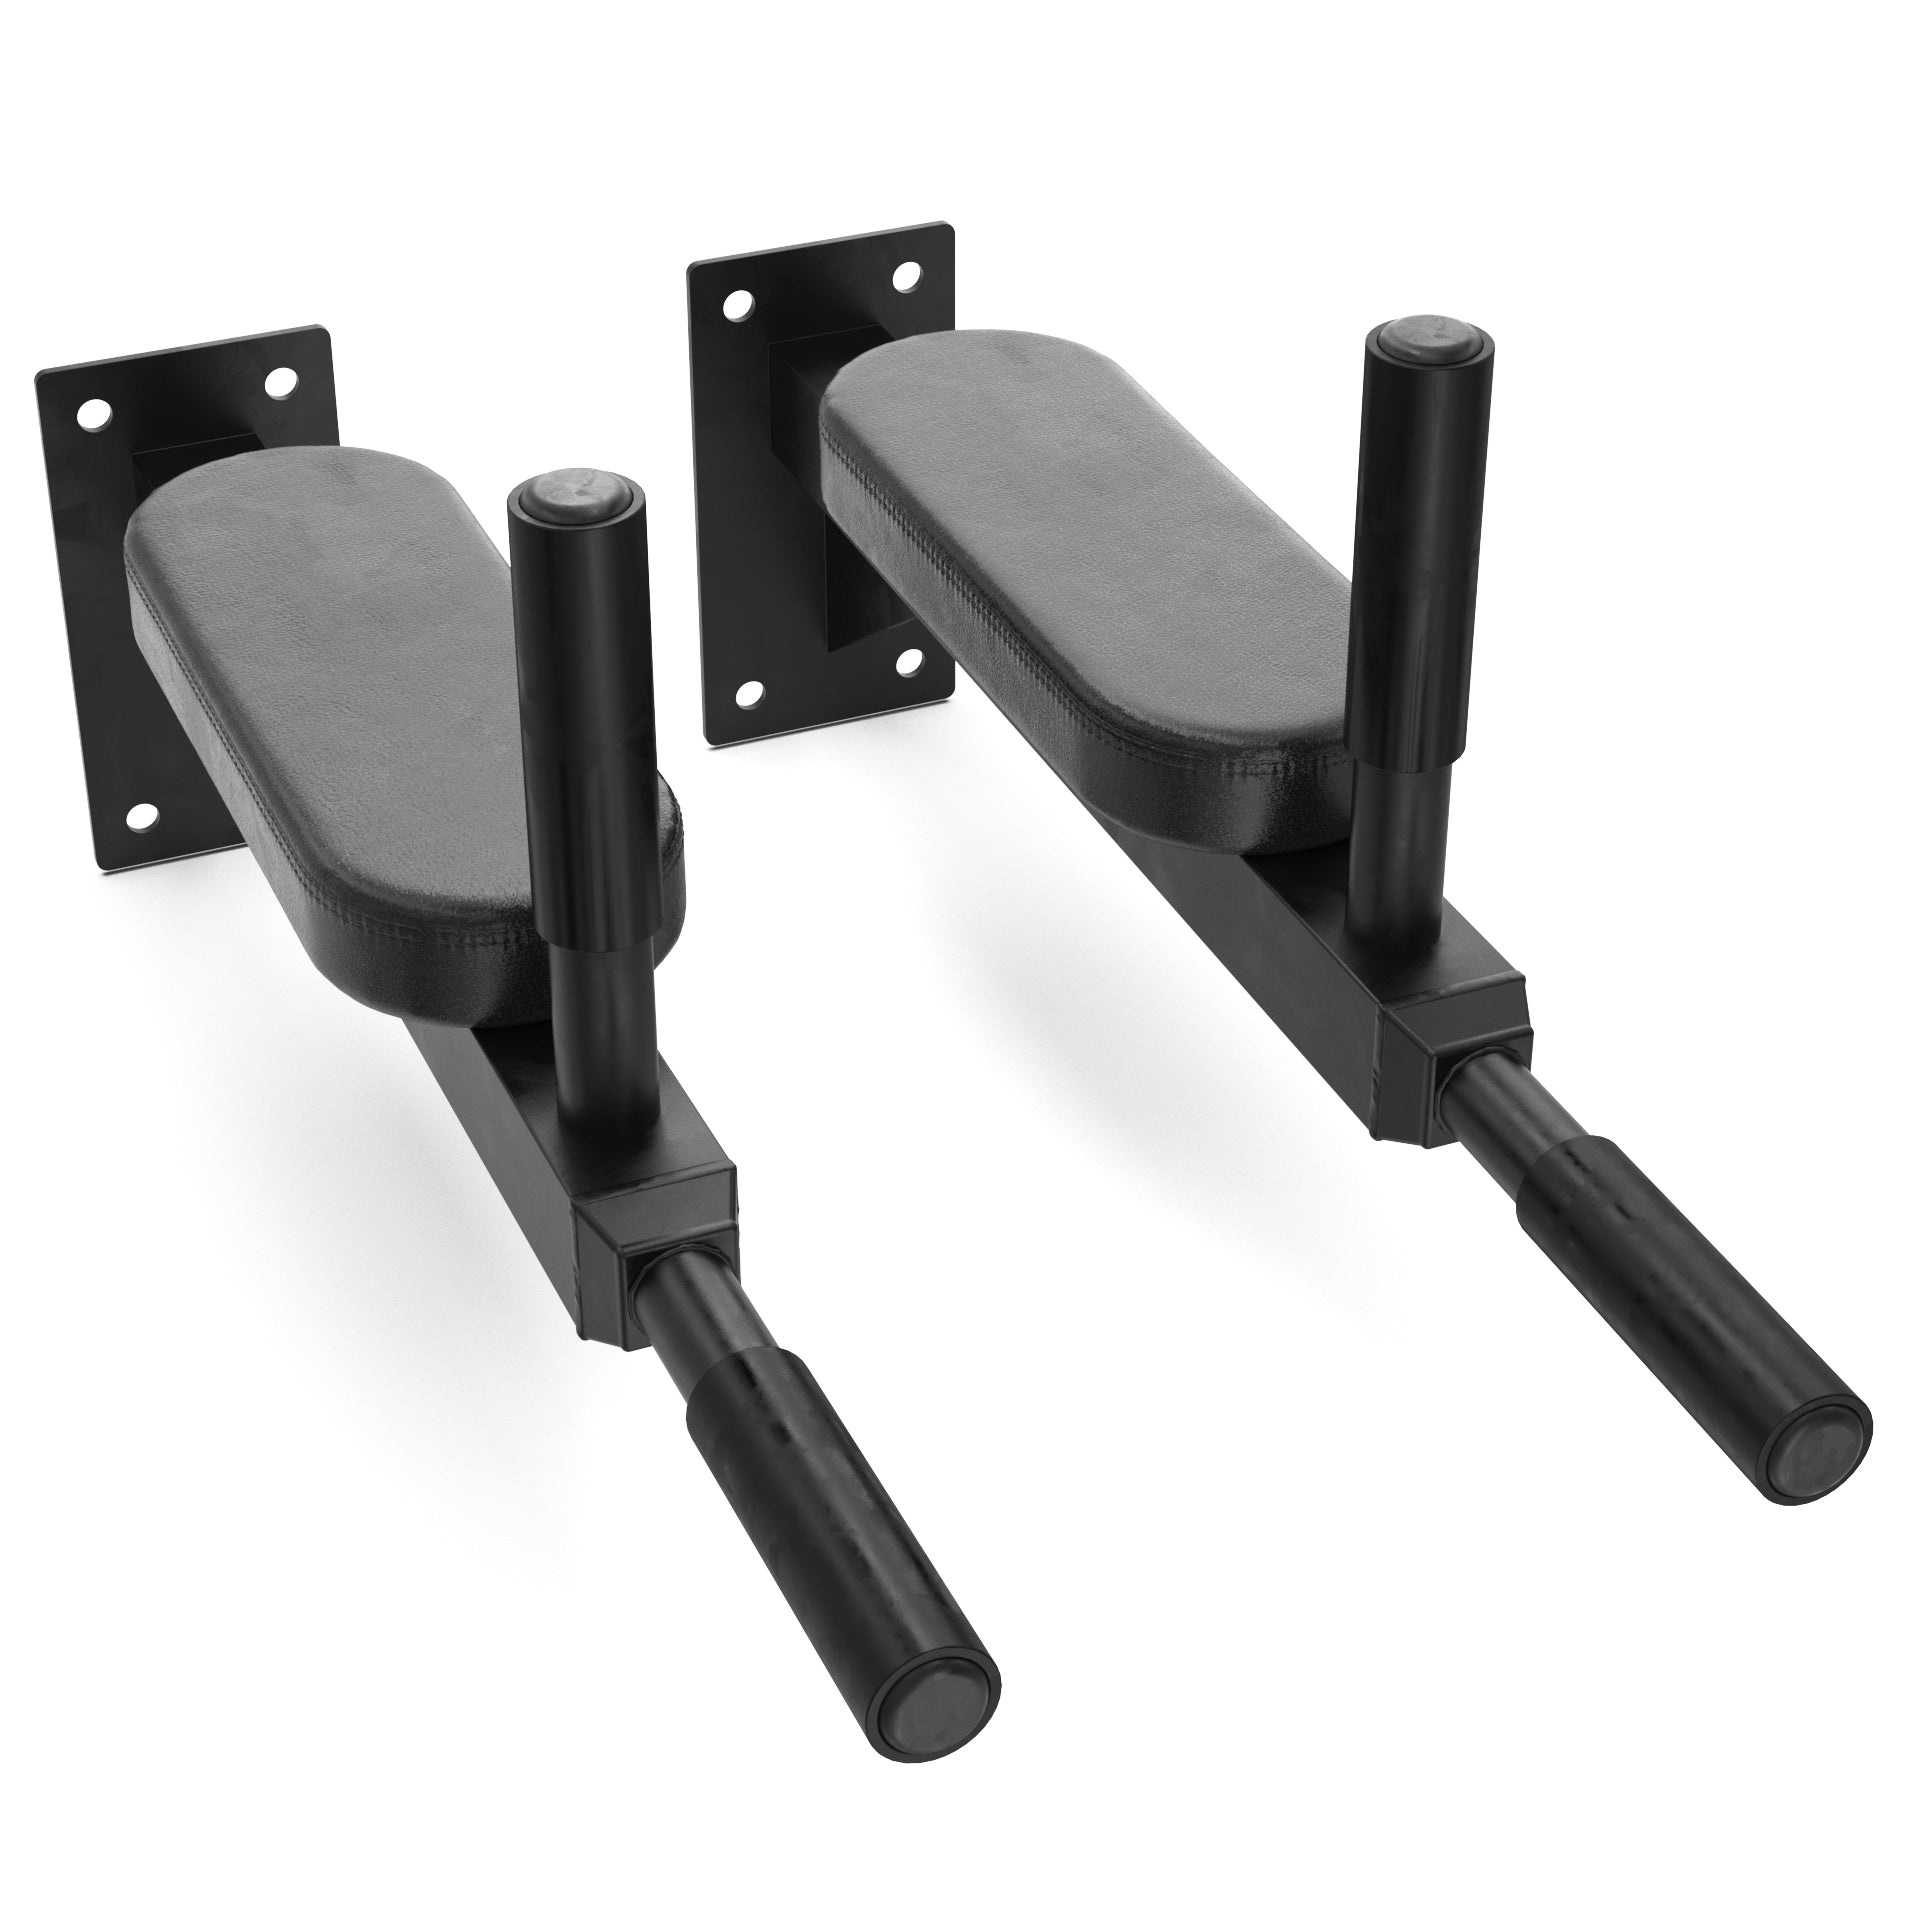
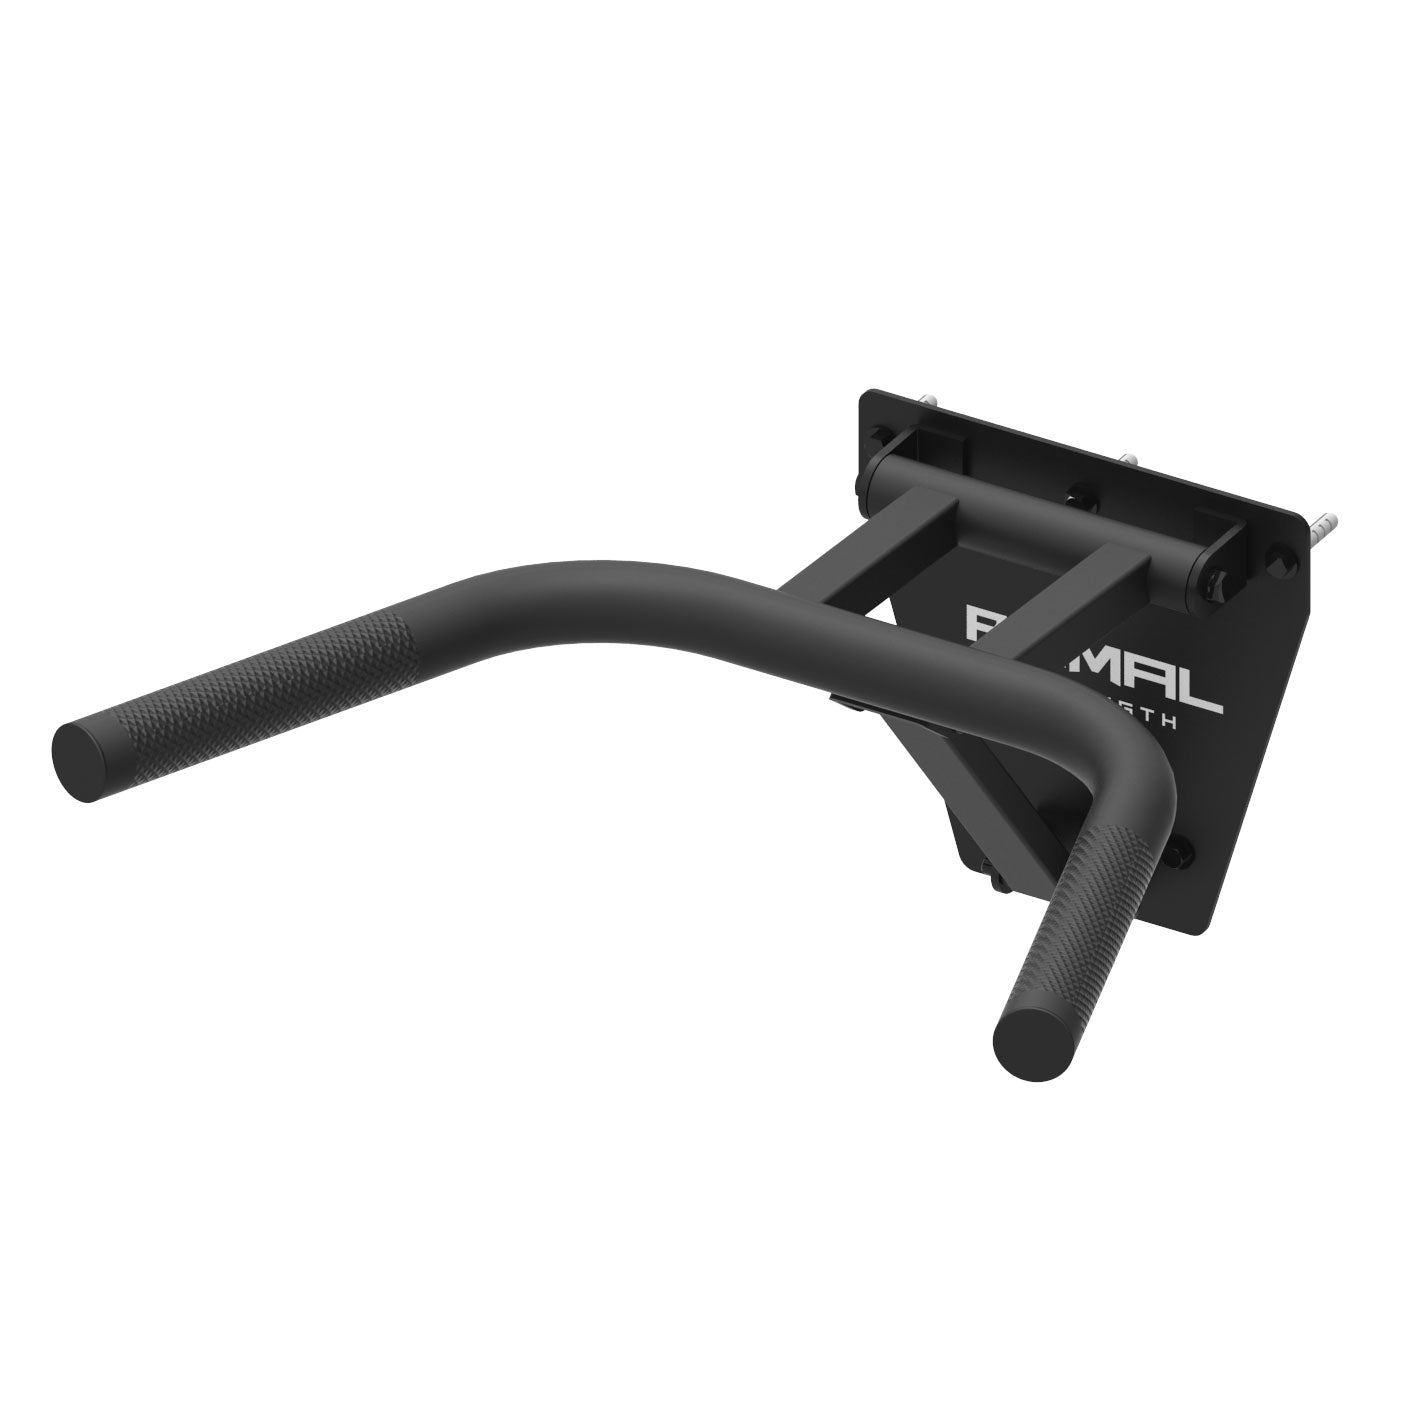
What Is A Wall-mounted Dip Station?
A wall-mounted dip station is a set of sturdy handles or bars attached directly to a wall. These stations are designed for exercises like dips, leg raises, and sometimes even pull-ups. Unlike free-standing or portable versions, wall-mounted dip stations become part of your home’s structure. They usually require drilling and strong anchors to hold your weight safely.
This fixed design offers a solid, non-moving base for challenging bodyweight exercises. Some models fold up against the wall when not in use, helping you save space.
Key Differences: Wall-mounted Vs. Other Dip Stations
To understand if wall-mounted dip stations are better, it helps to compare them with free-standing and portable options. Each type has pros and cons.
| Feature | Wall-Mounted | Free-Standing | Portable |
|---|---|---|---|
| Stability | Very high | Moderate | Low |
| Space Needed | Low | High | Very low |
| Installation | Permanent | None | None |
| Weight Capacity | High | High | Low–Moderate |
| Versatility | Moderate–High | Very high | Limited |
| Cost | Moderate | High | Low–Moderate |
Wall-mounted dip stations stand out for stability, weight support, and space-saving. However, they require installation and can’t be moved easily.
The Main Benefits Of Wall-mounted Dip Stations
1. Exceptional Stability
One of the biggest strengths is stability. Because they are fixed to a wall, these stations do not shift, wobble, or tip. This makes them safer for exercises like deep dips or explosive movements. People often find that wall-mounted stations feel much more solid than free-standing frames, especially on uneven floors.
2. Space Efficiency
For small home gyms or apartments, space is valuable. A wall-mounted station uses vertical wall space, not floor space. Many models can fold up or detach when not in use, freeing up your room. This is a big advantage over large free-standing towers that often dominate a corner.
3. High Weight Capacity
Wall-mounted dip stations often support more weight than portable or free-standing models. Many can handle 300–600 lbs (136–272 kg) or more, as long as they’re installed correctly into strong walls. This makes them suitable for heavier users or people who want to add weight plates to their dips.
4. Long-lasting Durability
Because they are fixed and not moved around, these stations tend to last longer. There are no moving feet, joints, or plastic parts to wear out. Most wall-mounted dip stations use thick steel and heavy-duty welds, which resist bending and breaking.
5. Clean, Professional Look
Many people prefer the minimalist design of a wall-mounted dip station. With fewer parts and a clean shape, these stations often blend better into modern home gyms. They avoid the cluttered look of big, free-standing racks.
6. Versatile For Calisthenics
You can use a wall-mounted dip station for more than dips. Many models support leg raises, L-sits, knee raises, and even some push-up variations. If the station includes a pull-up bar, your exercise options grow even more.
7. Lower Risk Of Tipping Accidents
With the station attached to a wall, there’s little risk of tipping—an issue sometimes seen with lighter, free-standing or portable units. This is especially important for beginners who may lack perfect balance.
Disadvantages And Limitations
While wall-mounted dip stations have many strengths, they are not perfect for everyone. Here are some real downsides you should know.
1. Permanent Installation
These stations require drilling into a strong wall—usually brick, concrete, or wood studs. This is not ideal for renters or people who can’t make permanent changes to their living space. Moving the station later is difficult and leaves holes behind.
2. Limited Placement Options
You must install the dip station where there’s a solid wall and enough open space to exercise safely. If your walls are thin or made of drywall only, installation is not safe. This can limit where you place the equipment.
3. Not Easily Adjustable
Unlike some free-standing towers, most wall-mounted stations cannot be adjusted for height once installed. This means all users, tall or short, need to work with the set height. Some advanced models offer limited adjustment, but this is rare.
4. Requires Tools And Diy Skills
Installation takes basic tools like a drill, stud finder, and wrench. You also need to know how to find strong points in the wall. For some people, this is a barrier, especially if they are not comfortable with DIY projects.
5. May Not Support All Exercises
While you can do many bodyweight moves, some exercises—like wide pull-ups or advanced gymnastics—require extra attachments or different equipment. Free-standing power towers may offer more versatility in this way.
Who Should Choose A Wall-mounted Dip Station?
Wall-mounted dip stations are a great fit for some, but not all, home gym owners.
Best For:
- People with limited space: If every inch of floor matters, wall-mounted saves valuable room.
- Homeowners or long-term renters: If you can drill into walls, you get a long-term solution.
- Intermediate to advanced users: The high stability and weight capacity are perfect for people who take bodyweight training seriously.
- Anyone wanting a clean, organized gym: Minimalist design helps keep your space tidy.
Not Ideal For:
- People who move often: Permanent installation is hard to relocate.
- Renters with strict landlords: Drilling holes may not be allowed.
- Those needing adjustable heights: If users of very different heights will share the station, this may be a problem.
- Anyone uncomfortable with DIY installation: If you can’t drill and anchor safely, look for free-standing or portable options.
Real-world Performance And User Experiences
Many fitness enthusiasts who switch from portable or free-standing dip stations to wall-mounted models report a big difference in performance.
- Stability during weighted dips: Users often mention that free-standing units can wobble or even tip when doing dips with extra weights. Wall-mounted stations remain rock-solid.
- Confidence in deep dips: Some users avoid going deep on portable frames due to fear of tipping. With a wall-mounted station, they can use a full range of motion safely.
- Less floor clutter: People living in small apartments appreciate getting their workout gear off the floor and onto the wall.
- Noise reduction: Free-standing frames can make noise by shifting or squeaking. Wall-mounted stations, if installed tightly, are nearly silent during exercise.
However, there are also reports of regret from people who did not realize their walls were not strong enough, or who had trouble installing the station level. Proper planning and installation are key.

Installation: What You Must Know
Before buying, check if your wall can safely support a dip station and your body weight.
Types Of Suitable Walls
- Concrete or brick: Best option, supports heavy loads.
- Wood studs: Acceptable if you anchor directly into the studs (not just drywall).
- Drywall only: Not safe. Never install directly on drywall.
Key Steps For Safe Installation
- Find strong supports: Use a stud finder or tap to locate solid wood or masonry.
- Use strong anchors: Heavy-duty screws or expansion bolts are needed.
- Level the station: Use a spirit level to ensure even handles.
- Double-check tightness: After installation, test the station with light pressure before using full body weight.
- Follow instructions: Each brand may have unique requirements—never guess.
If in doubt, ask a professional or experienced friend to help.
Features To Look For When Buying
Not all wall-mounted dip stations are created equal. Here’s what matters most:
1. Build Quality
Look for thick steel frames (at least 2 mm thick). Welds should be smooth and strong. Avoid thin, lightweight metal.
2. Handle Comfort
Handles should have non-slip grips. Some have padded foam, others use textured rubber. The grip should be wide enough for your hands but not so wide it’s uncomfortable.
3. Mounting Hardware
Check if the station comes with strong bolts and anchors. If not, you may need to buy better hardware for safety.
4. Weight Capacity
Choose a model rated for at least 50 lbs (23 kg) more than your body weight—especially if you plan to do weighted dips.
5. Distance From The Wall
Handles should be far enough from the wall (usually 16–24 inches / 40–60 cm) to allow for a full range of motion during dips.
6. Extra Features
Some models include a pull-up bar, back pad for leg raises, or even foldable arms. Decide if you want these extras.
7. Warranty
A good manufacturer will offer a warranty. This shows confidence in their product’s durability.
Comparison: Wall-mounted Vs. Free-standing Dip Stations
Here’s a closer look at how wall-mounted and free-standing stations stack up in real-life use.
| Factor | Wall-Mounted Dip Station | Free-Standing Dip Station |
|---|---|---|
| Stability | Does not move during use | Can wobble or tip, especially on thick carpets or uneven floors |
| Installation | Permanent, requires drilling | No installation, ready to use out of the box |
| Mobility | Not portable | Can be moved anywhere |
| Space Usage | Mounted on wall, minimal floor use | Needs large floor area |
| Height Adjustability | Usually fixed | Often adjustable |
| Cost | Moderate (some cheap, some premium) | Generally higher for strong, stable models |
Key Insight: Many beginners forget that the floor under a free-standing station can affect stability. Thick carpet, for example, makes tipping more likely. Wall-mounted units avoid this problem.
Common Mistakes When Choosing Or Installing
1. Ignoring Wall Strength
The biggest beginner mistake is trying to install a heavy dip station into weak drywall or thin paneling. This can lead to sudden failure and serious injury. Always check your wall type first.
2. Placing Too Close To Obstacles
Some people mount their station near doors, windows, or low ceilings, making exercises awkward or dangerous. Ensure you have at least 3 feet (about 1 meter) of clear space in all directions.
3. Not Checking Handle Width
Handle width matters. Too wide or too narrow, and dips become uncomfortable or even painful. Most people do best with handles about 18–24 inches (45–60 cm) apart. Try a few push-ups at different widths to see what feels best for you before installing.
4. Skipping The Weight Test
After installing, always test the station with a small amount of weight before doing a full dip. This checks for loose bolts or weak anchors.
5. Forgetting About Future Changes
If you might move soon, or if young children will use the station later, think ahead. Wall-mounted units are hard to relocate or adjust.
How Wall-mounted Dip Stations Help Progress Your Training
For people serious about calisthenics or upper body strength, a stable dip station offers big advantages:
- Full range of motion: You can dip deeper safely, building more muscle.
- Weighted dips: The solid base lets you add weight with a belt or backpack.
- Advanced moves: L-sits, leg raises, and even muscle-up progressions are easier on a stable station.
- Consistent technique: No wobbling means you can focus on form, not balance.
Non-obvious insight: Many people don’t realize that even a small wobble in a free-standing unit forces your body to work stabilizer muscles more. This can be good for some goals, but for pure strength and muscle growth, rock-solid stability lets you push harder and progress faster.
Cost And Value Considerations
Wall-mounted dip stations are usually in the $50–$150 price range for quality models. High-end versions with extras may cost more. Free-standing towers often cost $120–$300 or more, mainly because they use more metal and bigger bases.
But cost isn’t just about the price tag. Consider:
- Installation time: Wall-mounted stations take more effort to set up, but save space for years.
- Durability: Wall-mounted models often last longer with fewer moving parts to break.
- Resale value: Free-standing towers can be sold or moved easily, while wall-mounted units are harder to transfer.
Should You Build Your Own Wall-mounted Dip Station?
Some people try to build a DIY dip station from pipes or wood. If you have strong skills and understand load-bearing walls, this can work. But for most, buying a tested, well-designed model is safer. Store-bought stations come with safety ratings and instructions.
A poorly built DIY station can be dangerous.
Environmental And Safety Factors
Wall-mounted stations are safer in homes with children—there’s nothing to tip over. But installation must be perfect. If you live in an area with earthquakes, check local guidelines for securing heavy equipment on walls.
Another overlooked point: Wall-mounted stations don’t block emergency exits or pathways, which can be a risk with large free-standing towers.
Expert Opinions And Research
Many trainers recommend wall-mounted dip stations for serious bodyweight training, especially in small spaces. Studies show that dips activate the chest, triceps, and shoulders more fully when performed on stable equipment. According to a peer-reviewed study, stability in exercise equipment reduces injury risk and allows better muscle activation.
Some experts say beginners may benefit from a little instability to develop balance, but for most, stability is preferred for building strength and muscle.
Alternatives To Wall-mounted Dip Stations
If you cannot install a wall-mounted station, consider:
- Free-standing power towers: Offer dip bars plus pull-up and push-up options. More floor space needed.
- Portable dip bars: Lightweight, quick to set up, but less stable.
- Gymnastic rings: Great for advanced users, but much less stable—harder for beginners.
- Outdoor park equipment: Local parks often have dip bars for public use.
Frequently Asked Questions
What Is The Weight Limit For Most Wall-mounted Dip Stations?
Most quality wall-mounted dip stations support 300 to 600 lbs (136 to 272 kg) when installed in a strong wall with proper anchors. Always check the manufacturer’s rating and never exceed it.
Can I Install A Wall-mounted Dip Station In Drywall?
No, you should never install directly into drywall. Always anchor into solid wood studs, brick, or concrete. Drywall alone cannot hold your weight and will fail.
Are Wall-mounted Dip Stations Good For Beginners?
Yes, as long as you can install them safely and the handle width fits your body. The stable base is actually safer for learning proper form than a wobbly, portable dip bar.
Can I Do Other Exercises Besides Dips On A Wall-mounted Station?
Yes! Many models allow leg raises, L-sits, knee raises, and some have pull-up bars for extra options. Always check the product details to see which exercises it supports.
How High Should I Mount My Dip Station On The Wall?
The best height is usually where your feet do not touch the ground at the bottom of the dip, but you can still step up safely. For most people, this is about 48–52 inches (122–132 cm) from the floor to the top of the handles. Adjust for your height and comfort.
Wall-mounted dip stations are an excellent choice for people who want a stable, space-saving, and long-lasting way to train at home. With careful planning and installation, they offer unmatched performance for dips and many other bodyweight exercises. If you have the right wall and a long-term home gym plan, a wall-mounted dip station can be a smart investment for your fitness journey.