A dip station might look simple, but it’s one of the most versatile pieces of equipment you’ll find in any gym or home workout space. Many people walk past it, not realizing how much it can do for their strength, muscle tone, and overall fitness. If you’re trying to build upper body muscle, improve core stability, or just want a tool that supports a wide range of exercises, understanding the dip station is a game changer. Let’s explore what makes it unique, what you can do with it, and how to get the most out of this often-underestimated equipment.
What Is A Dip Station?
A dip station is a sturdy piece of exercise equipment, usually made from steel, with two parallel bars fixed at about waist height. Some versions are standalone frames, while others can be attached to power racks or walls. The main purpose is to support your body weight for different exercises, especially those targeting the upper body.
While the classic dip station design is simple, modern versions may include extras like adjustable handles, padded grips, or even back support for added stability. The core idea remains the same: use your own body weight to challenge your muscles.
Main Exercises You Can Do On A Dip Station
Many people think of dip stations as a tool for just one exercise—the triceps dip. But in reality, the range is much wider. Here are the main exercises you can do:
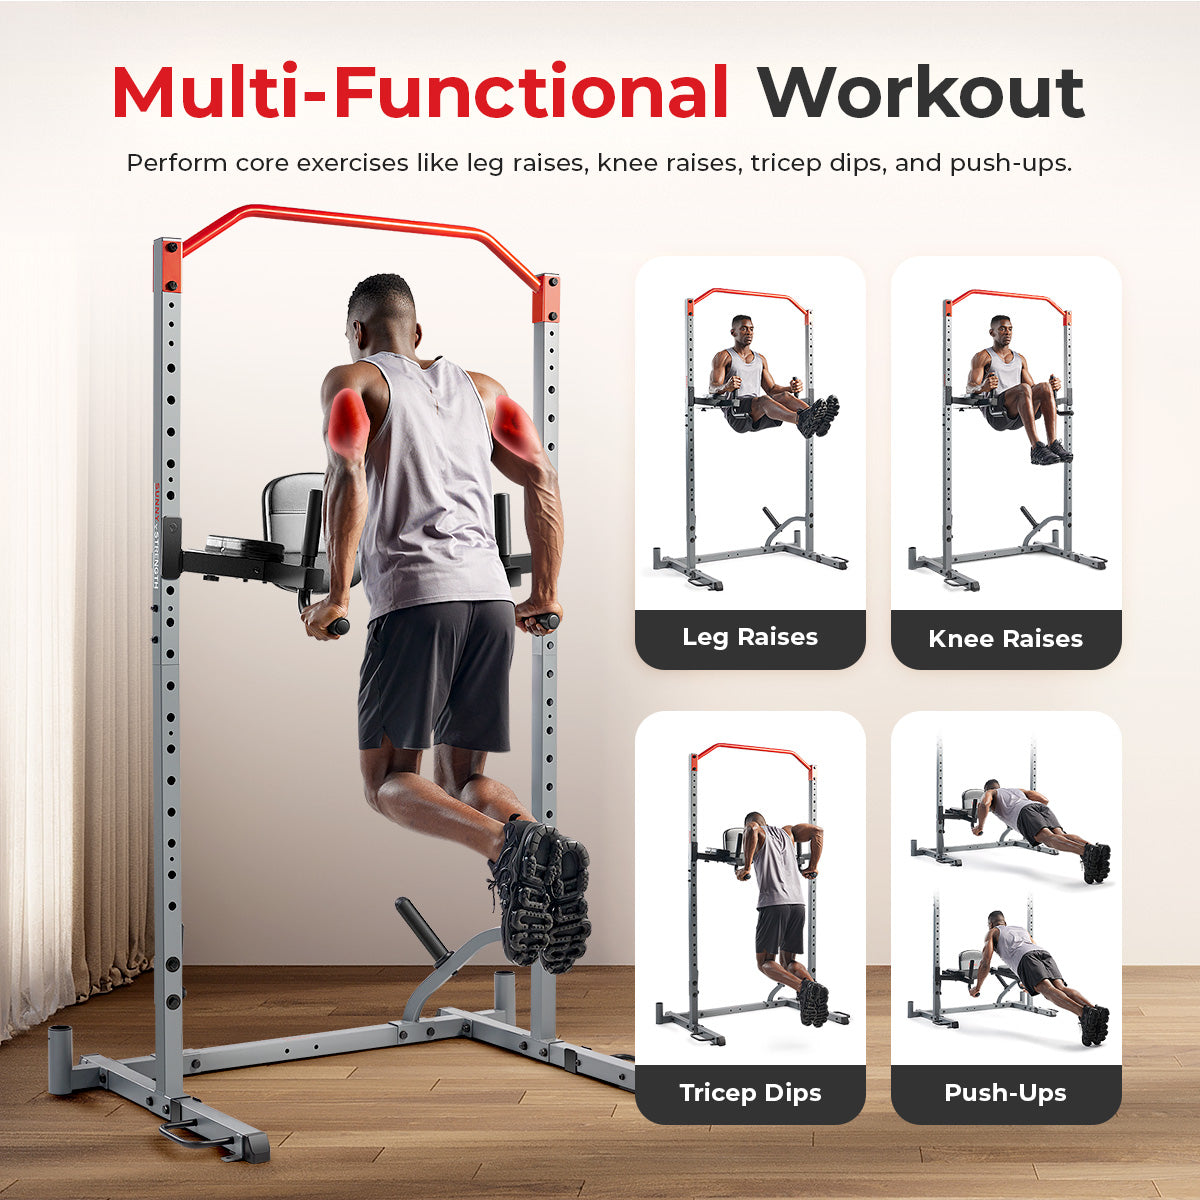
1. Triceps Dips
This is the classic move. Place your hands on the bars, lift your body, and lower yourself until your elbows are bent at 90 degrees. Then push up. Triceps dips primarily work the triceps, but also hit the chest and shoulders.
2. Chest Dips
Lean your torso forward during the dip, shifting more load to your chest. This small change in angle makes the exercise more chest-focused, which is ideal for building mass in the pectoral muscles.
3. Leg Raises
Grip the bars and hang with your arms straight. Raise your legs in front of you, keeping them as straight as possible. This challenges the abs and hip flexors.
4. Knee Raises
This is like leg raises but easier. Instead of straight legs, bend your knees and pull them towards your chest. It’s a great starting move for building core strength.
5. L-sit Holds
Sit between the bars, grip them, and lift your body with your legs extended straight out. Hold this position. The L-sit is a tough static move that works the abs, hip flexors, and shoulders.
6. Assisted Dips
Beginners can use a resistance band or have a partner support their legs to make dips easier. This helps you build strength before progressing to full bodyweight dips.
7. Negative Dips
Start at the top of the dip position and slowly lower yourself down. This eccentric-focused movement helps build strength if you can’t do full dips yet.
8. Incline Push-ups
Use the bars to do push-ups at an incline. This is easier than floor push-ups and is useful for beginners or as a warm-up.
9. Bodyweight Rows (australian Pull-ups)
Some dip stations allow you to position your body under the bars and pull your chest up to them. This exercise targets the upper back and biceps.
10. Straight Arm Supports
Simply hold yourself at the top of the dip position with locked elbows. It’s a static hold that challenges your shoulders, triceps, and core.
Non-obvious insight: Many people overlook static holds and negative reps on the dip station. These moves can dramatically improve strength and stability, especially for beginners.
Muscles Worked With A Dip Station
A dip station is especially powerful because it targets multiple muscle groups in one go. Here’s a breakdown of the main muscles worked:
- Triceps: The main muscle used in dips.
- Chest (Pectorals): Especially with a forward lean.
- Shoulders (Deltoids): Stabilize and press during dips and static holds.
- Core (Abdominals and Obliques): Engaged during leg raises, knee raises, and L-sits.
- Back (Latissimus Dorsi, Rhomboids, Trapezius): Engaged during bodyweight rows and for stabilization.
- Forearms and Grip: Supporting your body weight improves grip strength.
Different exercises on the dip station will shift focus to one muscle group or another. The versatility means you can build a balanced upper body with just this one tool.
Why Use A Dip Station? The Main Benefits
People often ask: Why not just do push-ups, or use dumbbells? Here’s what sets the dip station apart:
1. Compound Movements
Most dip station exercises are compound movements, meaning they work several muscles at once. This saves time and gives better functional strength than isolation exercises.
2. Bodyweight Training
You use your own weight as resistance. This makes it easy to adjust intensity (by adding or removing assistance) and reduces the risk of injury from dropping weights.
3. Progression And Versatility
You can start with easier moves and progress to harder ones as you get stronger. For example, begin with assisted dips, move to bodyweight dips, then add a weighted vest.
4. Core Activation
Unlike many machines, a dip station forces you to stabilize your whole body. This means your core works hard, even during exercises that focus on the upper body.
5. Minimal Space And Equipment
A dip station doesn’t take up much room and doesn’t require electricity or weights. It’s perfect for small gyms or home setups.
6. Supports Calisthenics And Functional Fitness
Many calisthenics athletes use dip stations for advanced moves like muscle-ups and planche training. It’s a foundation for bodyweight strength.
7. Joint Health
When performed with good form, dips can increase shoulder mobility and stability. However, proper technique is critical to avoid joint stress.
Non-obvious insight: Dip stations also improve grip endurance—an often-overlooked benefit that carries over to many other exercises and daily tasks.
How To Use A Dip Station Safely
Many people worry about hurting their shoulders or wrists when using a dip station. Here are practical steps to stay safe:
- Warm up your shoulders and wrists before starting.
- Use a full range of motion, but don’t go so low that your shoulders hurt.
- Keep your core tight to protect your lower back.
- Start with assisted dips if you’re a beginner.
- Progress slowly—don’t add weight or try advanced moves until you have mastered bodyweight dips.
- Stop if you feel sharp pain, especially in the shoulders.
Common mistake: Letting the shoulders shrug up towards the ears (elevated position) puts stress on the joints. Instead, keep your shoulders down and back during dips.
Who Should Use A Dip Station?
Dip stations are suitable for:
- Beginners: With modifications (assisted dips, knee raises), anyone can start.
- Advanced Athletes: Weighted dips, L-sits, and complex calisthenics moves offer a challenge.
- People with Limited Space: Compact dip stations fit in small home gyms.
- Those Focusing on Functional Strength: Great for athletes, martial artists, and anyone needing real-world strength.
- People Recovering from Injury: With professional guidance, dip stations can be used for rehab, focusing on controlled, pain-free movement.
However, people with existing shoulder injuries should consult a physical therapist before using a dip station, as the movement can stress the joint if not done properly.
Dip Station Vs. Other Equipment
To understand the value of a dip station, it helps to compare it with other common gym tools.
| Equipment | Main Exercises | Muscles Worked | Space Needed | Cost (approx.) |
|---|---|---|---|---|
| Dip Station | Dips, leg raises, L-sits | Triceps, chest, core | Low | $50–$200 |
| Pull-up Bar | Pull-ups, chin-ups | Back, biceps | Very low | $30–$100 |
| Bench Press | Bench press, flys | Chest, triceps | Medium-high | $200–$600+ |
| Parallettes | L-sits, push-ups | Core, chest, triceps | Very low | $30–$70 |
As you can see, the dip station gives you a strong mix of exercises, muscle activation, and value for money.
Types Of Dip Stations
Dip stations come in a few main types, each with strengths and weaknesses:
Fixed Parallel Bars
These are the classic gym-style dip bars. They’re sturdy, don’t move, and can handle heavy use. Best for commercial gyms or permanent home setups.
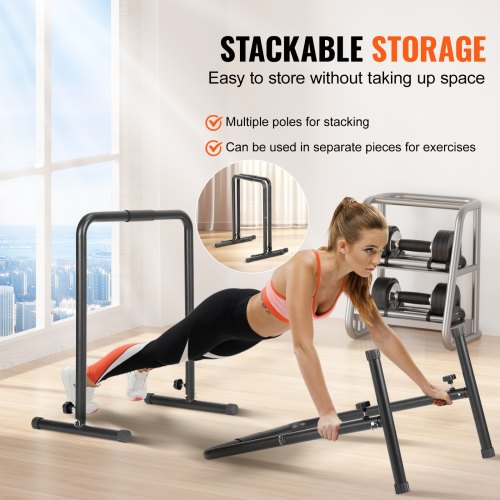
Portable Dip Bars
Usually two separate bars that you can move and store easily. They’re great for small spaces and home gyms, but may not feel as stable as fixed bars.
Wall-mounted Dip Stations
Attached directly to a wall, these save floor space and are very sturdy if installed properly. However, you can’t move them once installed.
Multi-function Power Towers
These combine a dip station with a pull-up bar, leg raise station, and sometimes push-up handles. They take more space but offer the most exercise options.
Adjustable Dip Bars
Some modern designs allow you to change the width or height of the bars to fit your body and exercise needs.
| Type | Pros | Cons |
|---|---|---|
| Fixed Parallel Bars | Very stable, durable | Not portable, needs space |
| Portable Dip Bars | Lightweight, easy to store | Less stable, lower weight limit |
| Wall-Mounted | Space-saving, sturdy | Permanent, needs strong wall |
| Power Tower | Multiple exercises, all-in-one | Expensive, large footprint |
| Adjustable Bars | Customizable, fits all users | May be less durable |
Tip: If you’re short on space or budget, portable dip bars are a smart choice. For maximum stability, choose fixed or wall-mounted options.

How To Choose A Dip Station
Buying a dip station is an investment in your fitness, so it’s important to choose wisely. Here’s what really matters:
1. Stability
The frame should not wobble, even when you use momentum (for advanced moves). Test the unit or check reviews before buying.
2. Weight Capacity
Make sure it can support your body weight—and more if you plan to add weights.
3. Bar Spacing
Bars that are too wide or too narrow can hurt your shoulders or wrists. Look for bars spaced 18–24 inches apart, or adjustable width.
4. Height
Bars should be high enough so your feet don’t touch the floor during dips or leg raises.
5. Grip Comfort
Padded or textured grips prevent slipping and reduce hand fatigue.
6. Space And Portability
Measure your available space. Choose portable or wall-mounted models if space is tight.
7. Extra Features
Some stations come with backrests, push-up handles, or even pull-up bars. Only pay for features you’ll actually use.
8. Build Quality
Steel frames last longer and are safer than cheap plastic or thin metal.
Common mistake: Many buyers focus only on price and skip checking bar spacing or stability. This can lead to discomfort or even accidents.
Real-world Examples: Who Uses Dip Stations?
Dip stations aren’t just for bodybuilders. Here are some real-world users:
- Calisthenics Athletes: Use dip stations for advanced skills like muscle-ups, planches, and front levers.
- Martial Artists: Build explosive pushing power and core control.
- CrossFit Trainers: Use dip stations in WODs (Workouts of the Day) for functional strength.
- Physical Therapists: Recommend dip stations for shoulder rehab and injury prevention, under supervision.
- General Fitness Enthusiasts: Want a simple, effective way to build upper body muscle at home.
Sample Dip Station Workout Routine
If you’re wondering how to use a dip station in your own training, here’s a balanced routine:
1. Warm-up:
Arm circles, shoulder rolls, and wrist mobility (5 minutes).
2. Assisted Dips Or Bodyweight Dips:
3 sets of 6–12 reps (use a band or partner for assistance if needed).
3. Knee Raises Or Leg Raises:
3 sets of 10–15 reps.
4. L-sit Holds:
3 sets, hold as long as possible (aim for 10–30 seconds).
5. Incline Push-ups On Bars:
3 sets of 12–20 reps.
6. Straight Arm Supports:
3 sets, hold for 20–40 seconds.
7. Cool Down:
Stretch shoulders, chest, and triceps (5 minutes).
Practical tip: Focus on quality form, not speed. Rest 1–2 minutes between sets.
How To Progress With A Dip Station
Progression is key to getting stronger and avoiding plateaus. Here are ways to make your dip station workouts harder over time:
- Add reps or sets as you get stronger.
- Increase range of motion by going deeper (without shoulder pain).
- Slow down the tempo—take 3–5 seconds to lower yourself.
- Add weight with a dip belt or weighted vest.
- Try harder moves like L-sits, muscle-ups, or planche leans.
Pro tip: Track your progress. Write down your reps, sets, and any changes in weight or difficulty. Progress may be slow, but consistency pays off.
Common Mistakes To Avoid
Even experienced users can make errors on the dip station. Watch out for these:
- Shrugging shoulders: Leads to joint stress.
- Partial reps: Not using full range of motion reduces effectiveness.
- Swinging legs: Reduces core engagement.
- Letting elbows flare out: Increases risk to shoulders.
- Ignoring pain: Sharp pain is a warning sign—stop immediately.
Cleaning And Maintenance
To keep your dip station safe and long-lasting:
- Wipe down grips after each use.
- Check bolts and screws monthly—tighten as needed.
- Keep the area under the station clear to prevent tripping.
- If portable, store it in a dry place to prevent rust.
Dip Station: More Than Just Dips
The dip station often gets overlooked in favor of more complex or expensive equipment. But its simplicity is its strength. With one sturdy tool, you can build muscle, improve joint health, and master advanced bodyweight moves—no gym membership required.
If you want to maximize your upper body and core strength, a dip station is a smart, affordable, and space-saving investment. It’s used by top athletes and beginners alike, and with proper technique, it will serve you for years.
For more on bodyweight training and exercise science, you can explore resources at Wikipedia.
Frequently Asked Questions
What Muscles Does A Dip Station Work?
A dip station mainly targets the triceps, chest, and shoulders during dips. It also works the core, forearms, and, depending on the exercise, the upper back.
Is A Dip Station Good For Beginners?
Yes, with modifications like assisted dips or knee raises, beginners can safely use a dip station. Start slowly, focus on form, and progress as you gain strength.
Can You Build A Big Chest With Dips Alone?
Dips, especially chest-focused dips, can significantly build chest muscle if performed with proper form and enough intensity. For best results, combine dips with other pushing exercises.
How Wide Should Dip Bars Be?
For most people, bars spaced 18–24 inches apart are ideal. If you have very broad or narrow shoulders, look for adjustable width bars to avoid joint strain.
Are Dip Stations Safe For Shoulders?
Dip stations are safe if you use good form, don’t go too low, and avoid letting your shoulders shrug up. If you have existing shoulder issues, consult a professional before starting.
A dip station is a powerful addition to any workout routine. With the right knowledge and technique, you can unlock its full potential for strength, muscle, and functional fitness.