Dip stations are a popular piece of fitness equipment, loved by home gym enthusiasts and professional athletes alike. They offer a simple way to train bodyweight exercises like dips, leg raises, and more. But while they help you build strength, many people worry about one thing: Do dip stations damage floors? This concern is real, especially if you’re training in a living room, bedroom, or apartment where the floor’s condition matters. Damaged floors can be expensive to fix, and landlords may not be forgiving. Let’s explore how dip stations interact with different flooring types, what risks exist, and how you can protect your space while enjoying your workouts.
Understanding Dip Stations And Floor Contact
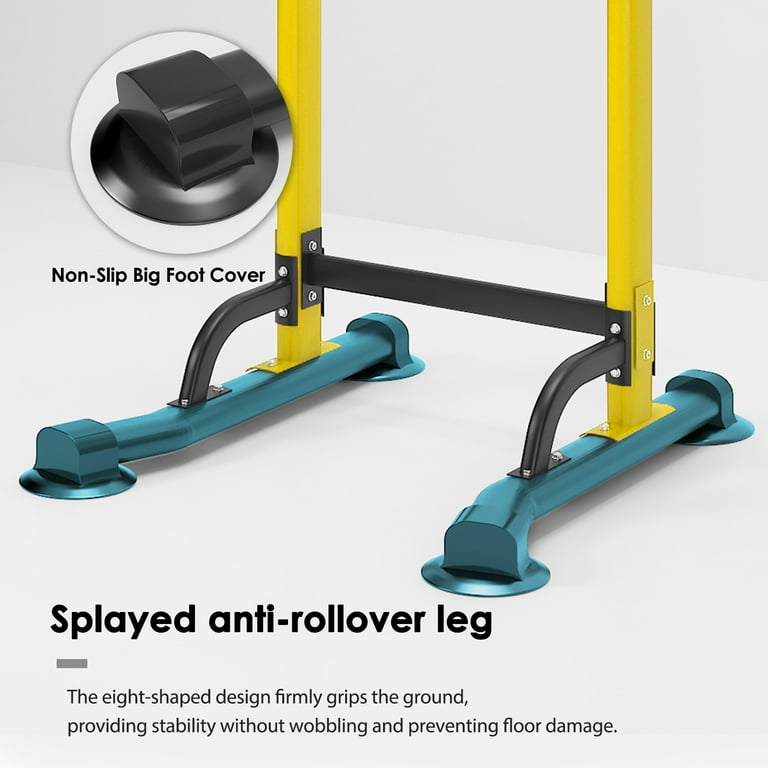
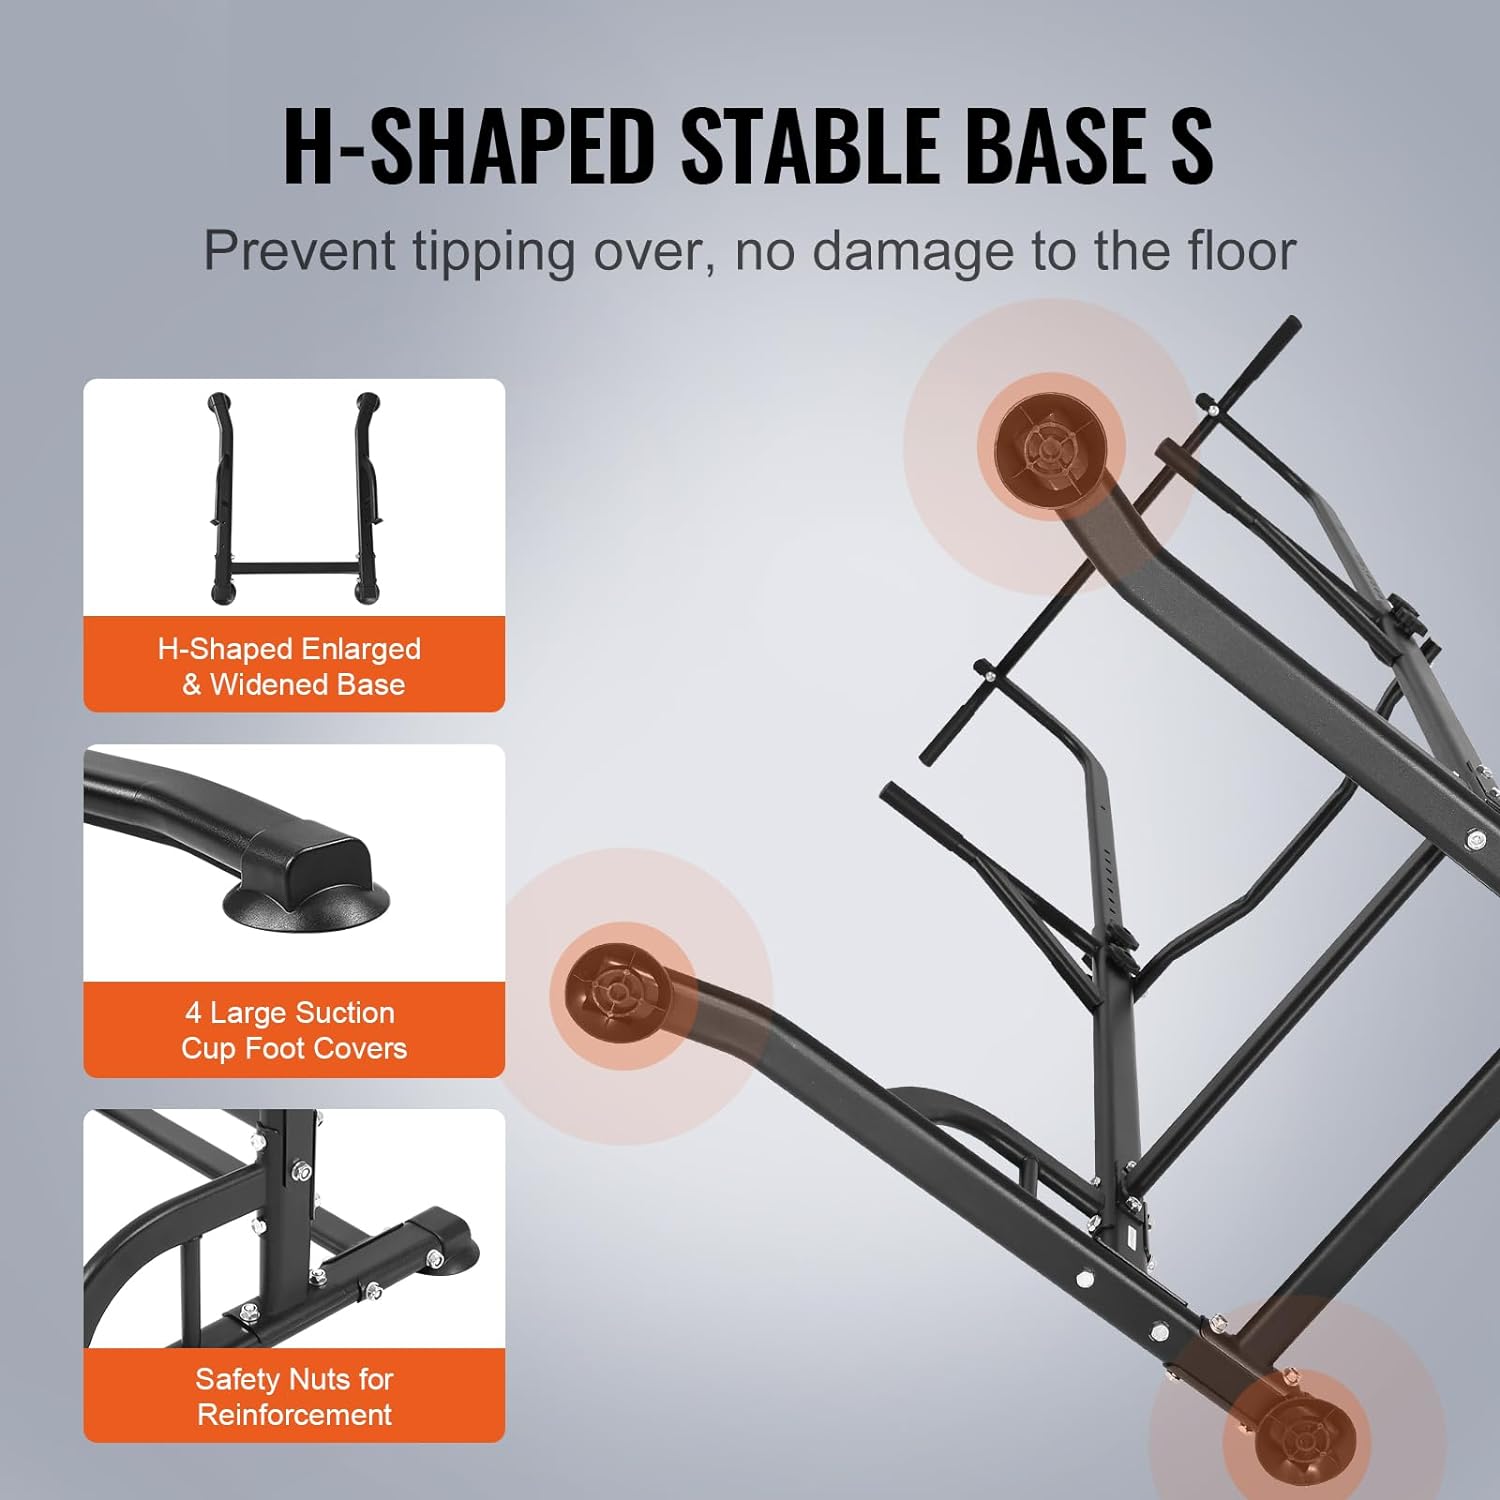
Dip stations come in various forms—freestanding, wall-mounted, or as attachments for power racks. Most home users prefer freestanding models because they are portable and don’t require drilling into walls. The base of a dip station is the main point of contact with the floor. It is usually made of steel tubing, which can be heavy and rigid. Some models have rubber or plastic feet, while others have bare metal ends. The design choices here matter for your floor.
The weight of the dip station, your body weight, and the forces generated during exercises all focus on the base points. When you perform a dip, you’re not just applying static weight—the station can shift, tilt, or slide, especially if you use momentum or perform explosive movements.
Over time, these forces can lead to scratches, dents, or even cracks in certain types of flooring.
Common Floor Types And Their Vulnerability
Not all floors react the same way to dip stations. Here’s how the most common home flooring types respond:
| Floor Type | Risk of Damage | Common Issues |
|---|---|---|
| Hardwood | High | Scratches, dents, finish wear |
| Laminate | Medium-High | Scratches, surface dents, swelling if moisture gets in |
| Tile | Medium | Chips, cracks, grout damage |
| Carpet | Low-Medium | Indentations, fiber wear, possible matting |
| Vinyl | Medium | Indentations, tearing, scratches |
| Concrete | Low | Possible marks, but little real damage |
Non-obvious Insight 1
Laminate floors often appear tough but are especially vulnerable at the seams. If a dip station’s foot sits on a seam and shifts, it can cause the boards to separate or buckle, especially if moisture is present.
How Dip Stations Cause Damage
It’s not just the weight sitting in one spot that causes trouble. Several actions during a workout can make things worse:
- Sliding: If your dip station doesn’t have grip pads, it can slide across the floor as you mount or dismount. Sliding is a top cause of visible floor scratches, especially on hardwood, laminate, and vinyl.
- Rocking: Uneven floors or a dip station with non-adjustable feet may rock. This movement concentrates force on small areas, pressing harder into the floor and causing dents or cracks.
- Impact Loading: Quick, jerky movements—like jumping dips or accidental drops—can drive the feet into the floor with extra force.
- Moisture Transfer: Sweat can drip down the station onto the floor, leading to moisture damage, especially on wood and laminate. Over time, this can cause swelling or staining.
- Long-Term Compression: Even without movement, a heavy station can leave permanent indentations, especially on soft surfaces like carpet, vinyl, or low-density wood.
Non-obvious Insight 2
The shape and material of the dip station’s feet have a bigger impact than weight alone. A heavy station with wide, soft rubber feet may cause less damage than a lighter one with small, hard plastic or metal feet.
Real-world Examples And Data
To see how real users experience this problem, let’s look at a few examples:
- Hardwood Horror: An athlete placed a steel dip station on their oak floor without any protective mat. After a few weeks, they noticed deep scratches where the station slid slightly during workouts. The cost to refinish that area was over $500.
- Laminate Lift: A user in a rented apartment found the laminate seams rising after a few months of dip training. The dip station’s foot was directly on a seam, and sweat from workouts caused swelling.
- Carpet Caution: On thick carpet, a dip station left only small indentations, but after moving the station, the fibers were permanently crushed. The marks never fully recovered.
These stories are not rare. In a survey by a major home fitness retailer, over 30% of dip station users reported some type of floor marking after six months, with hardwood and laminate users reporting the most costly repairs.

Comparing Dip Station Designs
Dip stations are not all the same. Here’s how different designs affect floor safety:
| Design Type | Floor Contact | Damage Risk | Notes |
|---|---|---|---|
| Freestanding with rubber feet | Wide, soft pads | Low | Best for home use; less movement |
| Freestanding with plastic/metal feet | Small, hard points | High | Most likely to scratch or dent |
| Wall-mounted | None (for floor), wall only | Very low | Protects floor but may damage walls |
| Power rack attachment | Depends on rack feet | Medium | Usually heavier, more stable but can still mark floor |
Experience-based Guide
If you’re buying a dip station, look closely at the base design. Wide, rubberized feet distribute weight and reduce sliding. Avoid stations with small, hard points unless you plan to use extra floor protection.
How To Prevent Floor Damage
The good news: you can enjoy dip stations at home without ruining your floors. Here’s how:
1. Use Protective Mats
Placing a thick, non-slip mat under your dip station is the most effective way to protect your floor. Look for high-density rubber mats (at least 1/2 inch thick). These are sold as gym flooring and can absorb force, prevent sliding, and block moisture.
- For hardwood/laminate/tile: Use a mat that extends at least 12 inches beyond each base foot.
- For carpet: Choose a mat with a textured bottom to prevent movement.
2. Upgrade The Feet
If your station has hard plastic or metal feet, add aftermarket rubber caps. These are cheap and slide over most tube ends. Wider caps (2 inches or more) spread the load and add grip.
3. Check Floor Condition First
Before placing your station, inspect the area. Avoid seams or weak spots in laminate or vinyl. For tiles, position the feet on the center of tiles, not the edges or grout lines.
4. Keep Floors Clean And Dry
Small particles like sand or grit between the feet and floor can act like sandpaper, causing scratches. Wipe the floor before each session and clean up sweat immediately after workouts.
5. Avoid Excessive Force
Perform controlled movements. Explosive or jerky exercises not only risk injury but also drive more force into the floor. Focus on slow, steady reps.
6. Rotate The Position
If you must use your station directly on the floor, change its location occasionally. This prevents long-term indentations in one spot, especially on carpet or soft wood.
7. Test Before Committing
Place the station in your chosen spot and do a few reps. Check for movement or marks. If the station slides or rocks, add extra protection before continuing.
Mistakes Beginners Make
Even with good intentions, mistakes happen. Here are the most common errors:
- Ignoring the Feet: Many assume all dip stations come with rubber feet. Some cheaper models use hard plastic or bare metal, which can gouge floors quickly.
- Underestimating Weight: A lightweight dip station may seem harmless, but your body weight adds much more pressure during use.
- Using Thin Yoga Mats: Yoga mats are often too thin and soft to stop dents or scratches. Use gym-rated mats instead.
- Skipping Maintenance: Sweat, dust, and dirt can slowly damage both the station and the floor if not cleaned after each workout.
- Not Reading the Manual: Some stations come with floor protection advice or even include protective pads. Skipping the instructions can mean missing out on built-in solutions.
Cost Of Repairs: What’s At Stake?
Damage from a dip station can be surprisingly expensive to fix:
- Hardwood refinishing: $3–$8 per square foot
- Laminate board replacement: $100–$300 per section
- Tile repair: $150–$500 for a few tiles
- Vinyl tear patching: $50–$200
- Carpet replacement: $2–$7 per square foot
If you’re in a rental, your landlord may charge for full replacement even for small marks. Taking simple precautions is usually much cheaper than fixing the damage.
Alternatives To Traditional Dip Stations
If you’re worried about floor damage but still want to train dips, consider these alternatives:
- Wall-Mounted Dip Bars: Attach directly to the wall, completely avoiding the floor. Requires strong walls and proper installation.
- Doorway Dip Bars: Use the door frame for support. Limited weight capacity but very floor-friendly.
- Outdoor Training: Use park equipment or build a station outside, where floor damage isn’t a concern.
- Power Tower Stations with Large Bases: Some have wide, rubberized platforms that spread out the load more safely.
- DIY Solutions: Build a padded base using plywood and thick rubber matting to create a mobile, protective platform.
Why Some Gyms Don’t Worry About Floor Damage
Commercial gyms often use thick rubber flooring (¾ inch or more) throughout. This absorbs almost all force from equipment. In addition, their floors are designed to handle heavy loads and high traffic, unlike most residential spaces. If you want the same protection at home, invest in commercial-grade mats or interlocking tiles.
Practical Tips For Long-term Floor Safety
To sum up, here are some practical steps to keep your floors safe and your workouts stress-free:
- Always check the feet of your dip station before first use.
- Invest in a mat designed for heavy fitness equipment.
- Clean both the station’s feet and the floor regularly.
- If possible, dedicate a specific area of your home for workouts and protect it well.
- When in doubt, test protection with a heavy book or box before placing the full station.
The Bottom Line: Do Dip Stations Damage Floors?
The answer is: Yes, dip stations can damage floors if used without proper precautions. The risk depends on your floor type, the design of your dip station, and how you use it. Hardwood, laminate, and vinyl are most at risk. Damage usually comes from sliding, impact, moisture, or long-term compression. But with simple steps like using thick mats, upgrading feet, and regular cleaning, you can prevent almost all issues.
It’s important to remember that prevention is much easier—and cheaper—than repair. Take the time to set up your home gym safely, and you’ll enjoy your workouts without worrying about costly surprises.
For more on protecting your home gym floors, you can read about gym flooring solutions on Wikipedia.
Frequently Asked Questions
How Do I Know If My Dip Station Will Damage My Floor?
Check the material and shape of the feet. Small, hard feet are more likely to scratch or dent. If your floor is hardwood, laminate, or vinyl, use a thick rubber mat underneath. Test the station by gently moving it—if it slides or marks the floor, add protection before doing full workouts.
Can I Use A Yoga Mat Under My Dip Station?
A typical yoga mat is too thin and soft for heavy dip stations, especially with dynamic exercises. It may help a little with scratches but won’t prevent dents or stop the station from sliding. Use a thick, high-density rubber mat designed for gym equipment instead.
What If My Floor Is Already Damaged?
If you notice new marks or dents, stop using the dip station in that spot. For minor scratches on wood or laminate, you can try repair kits, but deep dents or cracks may need professional help. Prevent further damage by moving your station and adding proper floor protection.
Are Wall-mounted Dip Bars Safer For Floors?
Yes, wall-mounted dip bars avoid floor contact completely. However, they require strong walls and proper installation. Make sure your wall can handle the load, and follow the manufacturer’s instructions to avoid wall damage.
Is It Safe To Use Dip Stations On Carpet?
Carpet is less likely to show scratches, but dip stations can leave deep indentations, especially on plush or low-quality carpet. Over time, the fibers may not fully recover. Use a mat with a textured bottom to spread the load and prevent long-term damage.
Carpet tiles are easier to replace if needed.
Dip stations are a fantastic tool for strength training at home, but protecting your floors is key to a stress-free experience. With the right setup, you can train hard and keep your space looking great.
